
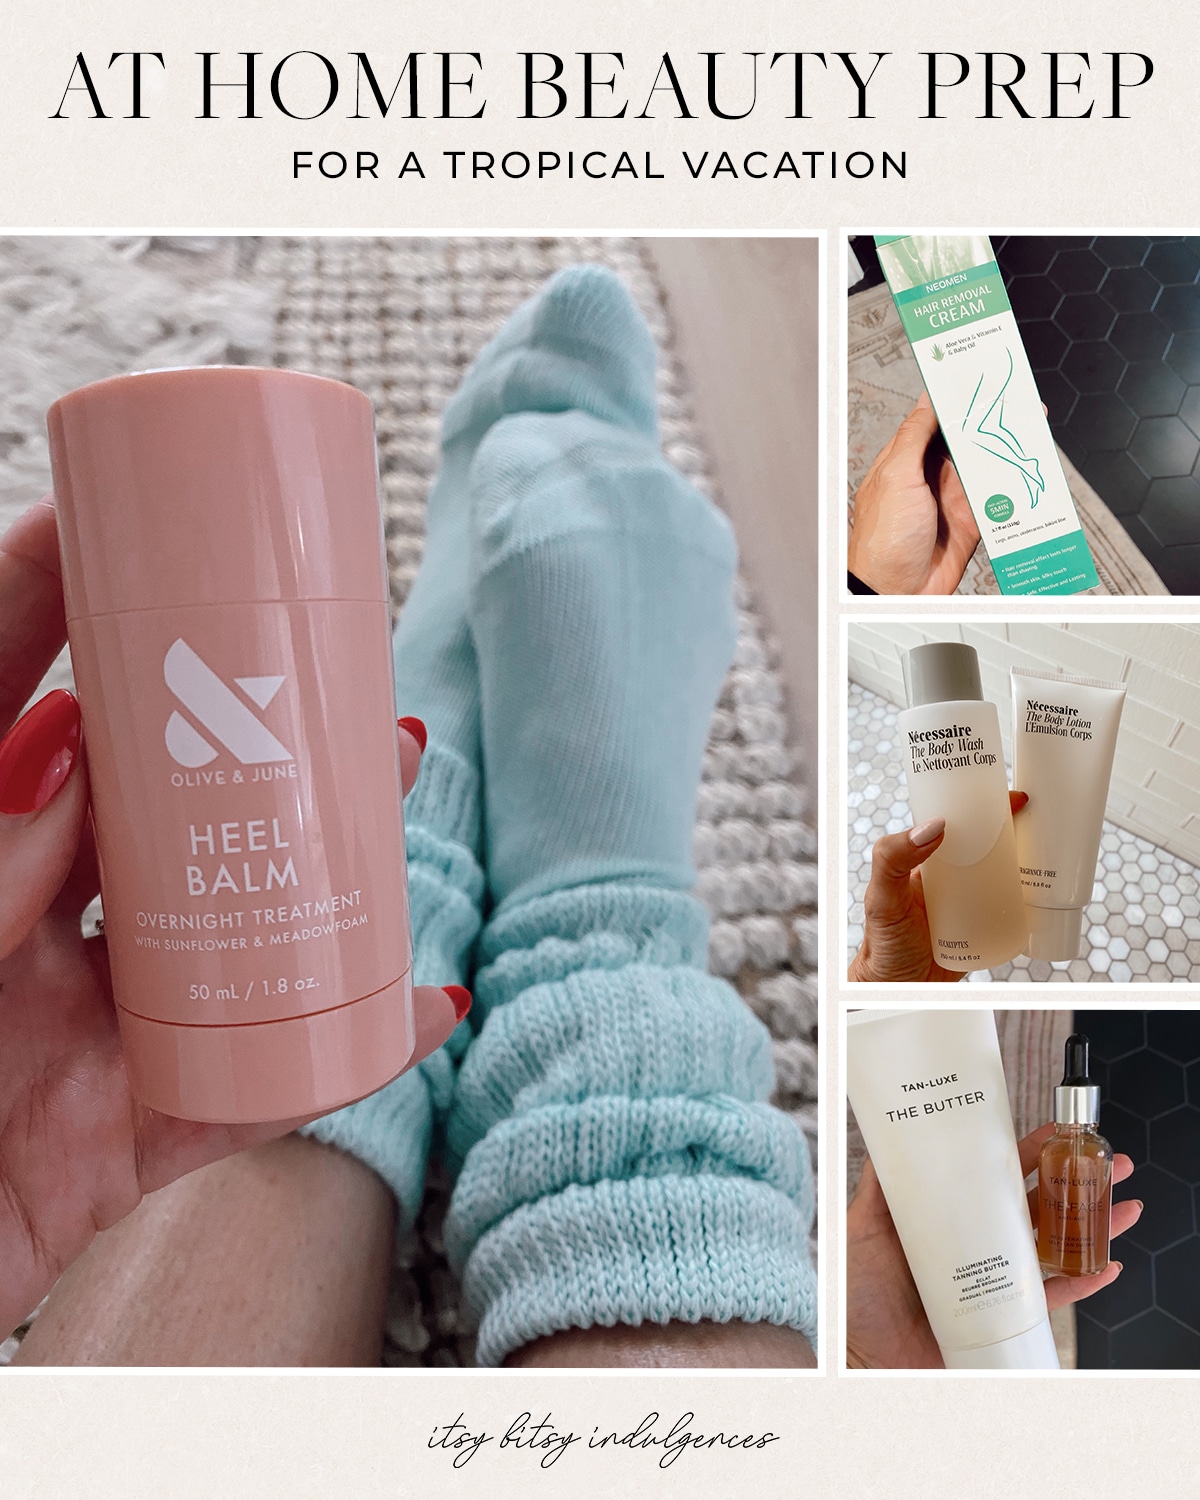
As we prep to head out of town this coming weekend, I’ve already put together my packing list (I don’t like leaving this to the last minute), as well as the girl’s (I always feel like there are so many little things that I could possibly forget for them)… and now that we’re two days away from departure, I’m starting some of my at home beauty prep….
Ever since having Camille (so almost 3 years ago), it just became easier to find ways to do many of my favorite beauty prep at home. So for the past several years I’ve come to rely on a pretty simple, and effective, way to prep at home for warm weather trips… everything from a mani/pedi… to self tanning… and yes, hair removal. So today I put together the easy steps and the products I rely on…..
________
MANICURE + PEDICURE
I’ve shared this a few times before, but sitting in a nail salon is the opposite of self care for me… I just sit there and think of all the other things I could be doing. Given that, I’ve done some experimenting over the years and think I’ve come up with a really good at home manicure and pedicure system. I love the Olive and June systems… they’re non-toxic, gentle on the skin, and I always get such great results.
I purchased the pedicure system towards the end of last summer and it was a real game changer for me. My heels tend to get dry and cracked… and I never really found anything (except the nail salon) that really worked. The foot serum, heel balm (particularly this one), and the foot file (the entire system is available here) really keep my heels, and sides of my big toes, looking smooth and soft. Then I use the cuticle remover and toe pusher to clean up the cuticle area. After buffing and filing the nails, I add paint and clean up the cuticle area with this little brush…
For a manicure, I’ve become slightly obsessed with the Olive + June Press On line. I’ve been wearing them since November. They’re non-toxic, made from upcycled materials, and come in around $10. Most press on nails are too big for my fingers, but these have so many different sizes that I can find the perfect fit. I’ve had the almond shape/medium length (which is so beautiful, but not always practical as a mom with little ones…) and the squoval shape/short length (which is more rounded than square)… and prefer the shorter length since they are more functional, and last so much longer. My last set of red press ons (in the short length) lasted two weeks. After that, three popped off. So I simply glued them back on and got another week’s worth of wear out of them before I needed to remove them completely (mainly because I wanted to switch out the color…). For removal, with the longer lengths, they typically just all pop off. With the shorter length though, I followed the soaking instructions and most came off… I removed the remaining three nails with the press on removal system. My nails never look damaged like they do with gel, which is an added bonus. And as for prepping my nails… I use this cuticle serum and the nail file/buffer I shared above.
HAIR REMOVAL
Before the pandemic, I was all about going into the salon for waxing services… but once COVID came and salons closed, I had to get creative. I tried an at home waxing system, and while it was good… I just couldn’t bring myself to repeatedly inflict that sort of pain upon myself… so I went back to researching more options and found this hair removal cream (that works for the bikini line). I’ve been using it for two years now and have been so happy with the results. Waxing obviously lasts the longest, but this gives me 5ish days… and it’s completely pain free (yessss!). I leave it on five minutes longer than they suggest for optimum results.
SELF TANNING
Something else I started working on a few years ago, was finding a good at home self tanning routine. When Camille was born (so almost 3 years ago), I started using Tan Luxe and have been super happy with the results. Here is my prep/application routine for the face and body:
BODY
I do this 2-3xs a week to maintain a subtle glow and follow the routine below:
Step 1: I prep in the shower…. I use the Necessaire body exfoliator which helps to remove any dead skin to create a smooth surface to apply self tanning products. I prefer their eucalyptus scent… makes me feel as if I’m at a spa. I also do a quick shave of the legs (but only 2ish times a week…)…

Step 2: Once I get out of the shower, I use the Necessaire Body Serum to for a boost of hydration to my skin (sine hydration is key to maintaining a tan… this step helps a lot). I’ve been using the body serum for several months now, and it’s amazing how smooth and hydrated my skin feels… especially naturally “rough” areas like my heels. It has hyaluronic acid, which helps to promote healthier, more supple skin.
Step 3: I apply my Tan Luxe Body Butter self tanner all over…. I’ve been using this self tanner for almost 2 years now and I’m a huge fan. It’s not scent free (although I am very sensitive to smells) but it’s not overpowering, which I am okay with. It’s formulated without parabens, phthalates, mineral oils, and sulphates and uses all organic ingredients. I have found it to give me a great “natural” tan look, without looking like I’m orange (I do have a more olive skin complexion, just for reference). I’ve never had an issues with streaks… and I apply it just as I would regular moisturizer.
Step 4: I apply a little bit on the Necessaire body lotion to ensure that my skin stays sufficiently hydrated. Their lotion has Niacinamide which is a super vitamin that helps to build up the skin barrier to maintain moisture and protect skin from oxidative stress such as pollution, sun, and other toxins.
Step 5: In between applications, I use the Necessaire body wash since it’s gentle and won’t strip the tan away.
FOR THE FACE
I apply a self tanner to the face 3xs a week and follow this routine….
Step 1: Exfoliate. I swear by the TULA exfoliating scrub (I’ve been using it for 5 years and haven’t found anything as good…).
Step 2: I go through my evening skin care routine with my eye cream, toner, and serum….
Step 3: I apply 2-3 drops of the Tan Luxe illuminating facial drops (I have the light-medium shade) to my evening moisturizing cream and then apply it all over. I wake up with a sun kissed glow that makes it so easy to apply just a little bit of foundation and concealer (so it simplifies my make-up routine, which is nice). I’ve never had issues with streaking either.
