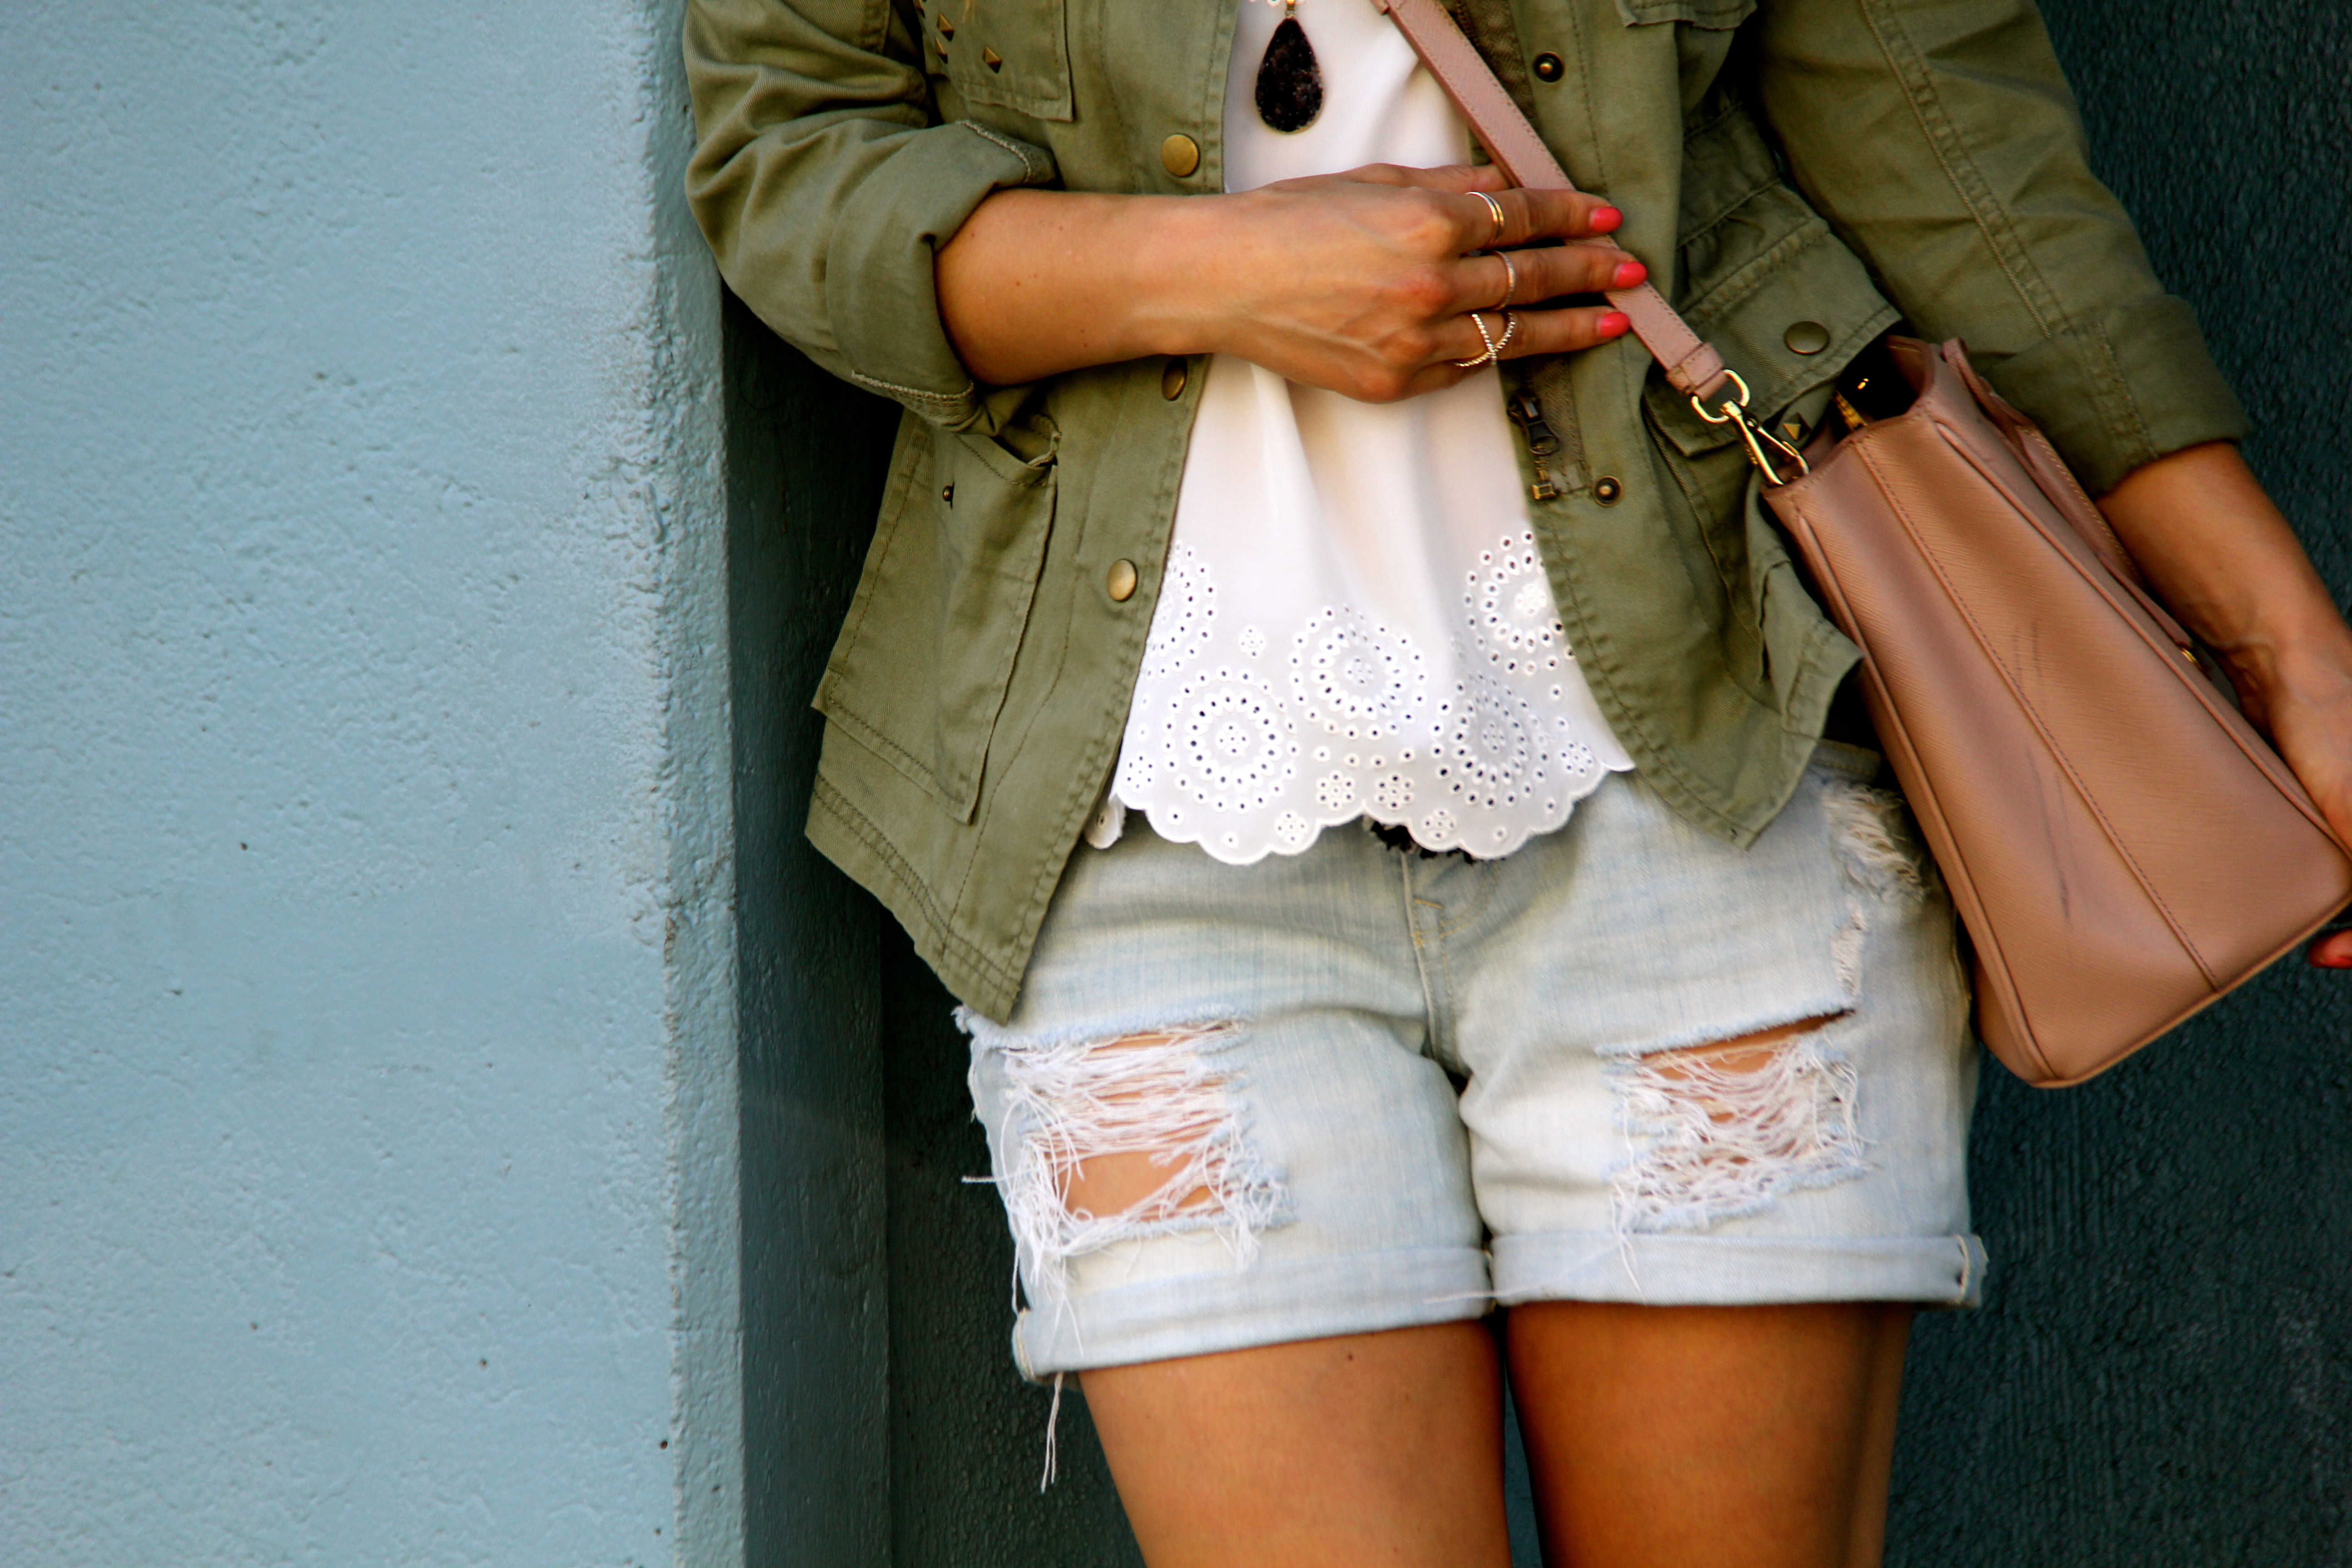


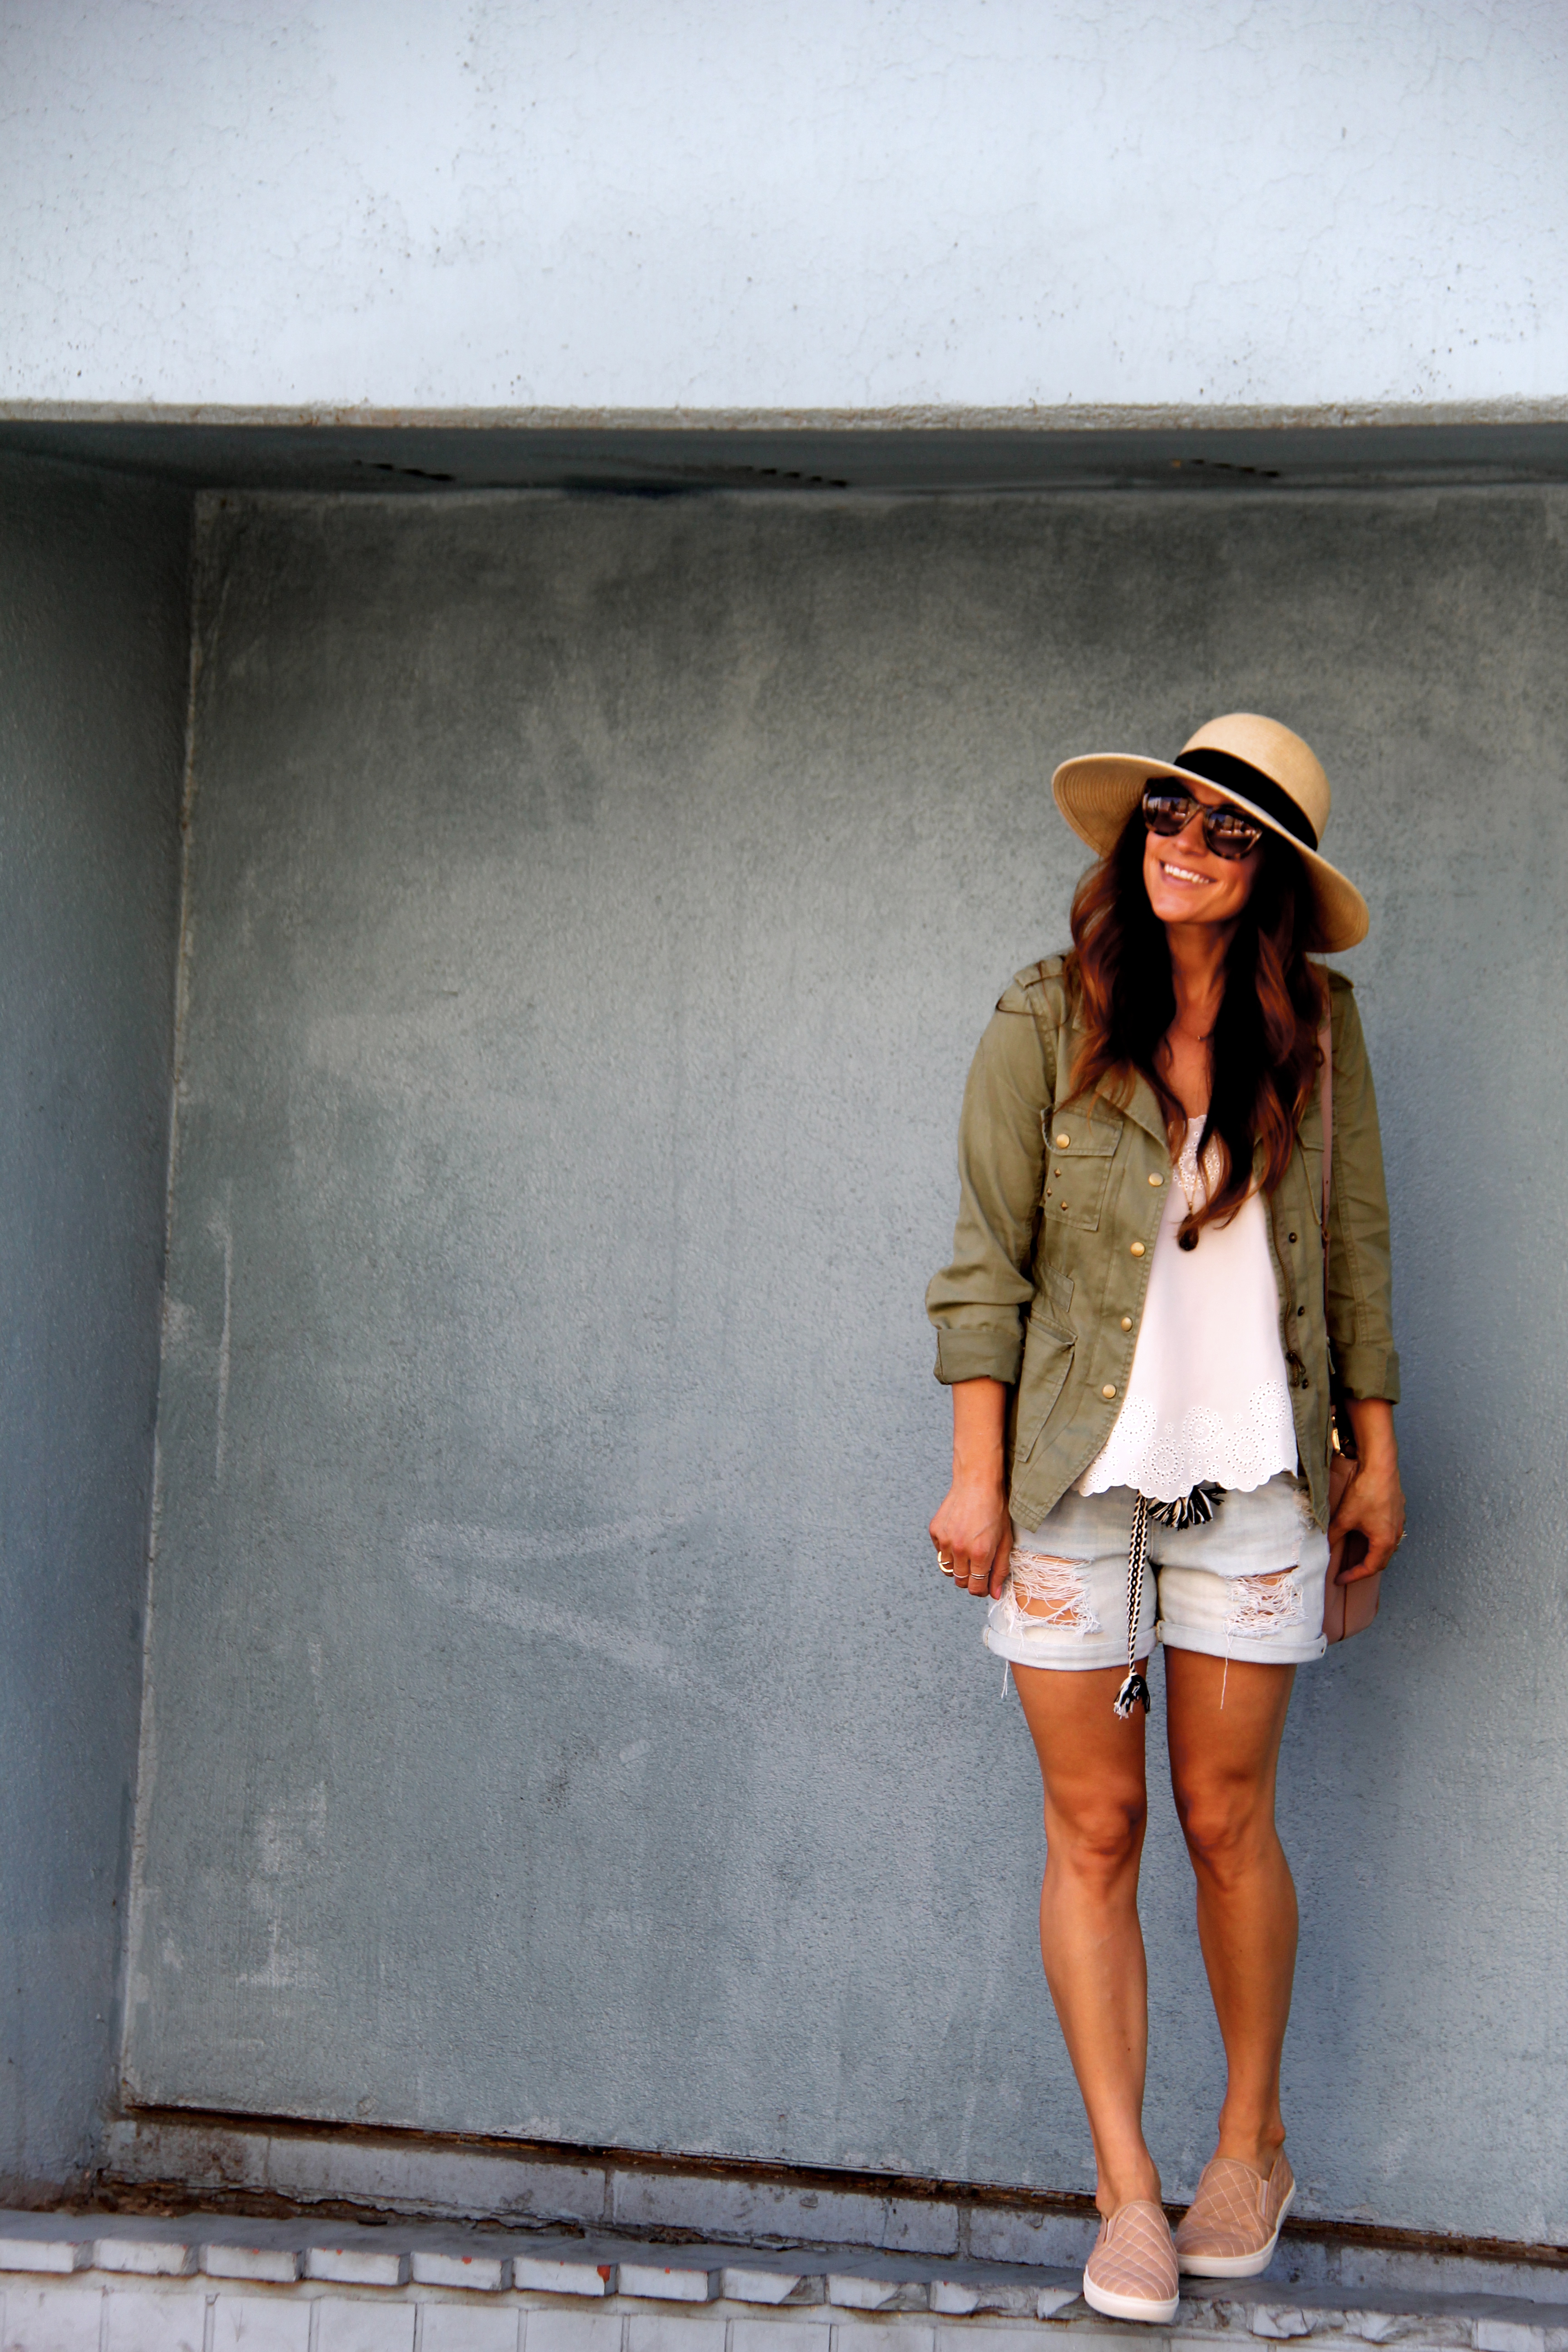
A few weeks ago I posted an outfit that consisted of my handy DIY skills (which are sometimes here and sometimes nowhere to be found…) on a pair of denim shorts. Well, today, I bring you the step-by-step process of how to create your own! There is something so relaxed and effortless about this style. And while yes, I understand they look like they had a fight with a lawn-mower, they can still be dressed up (as seen here) and down, as seen in today’s post. After having spent several weekends out of town, this past weekend was filled with errands and catching up. Running from 90 degree weather into the freezing cold aisles of Trader Joe’s (that’s why the jacket was necessary), it was the perfect outfit to toss on for any errand. Also, notice the shoes?? That’s right, they’re from Sunday night’s steal vs. splurge!
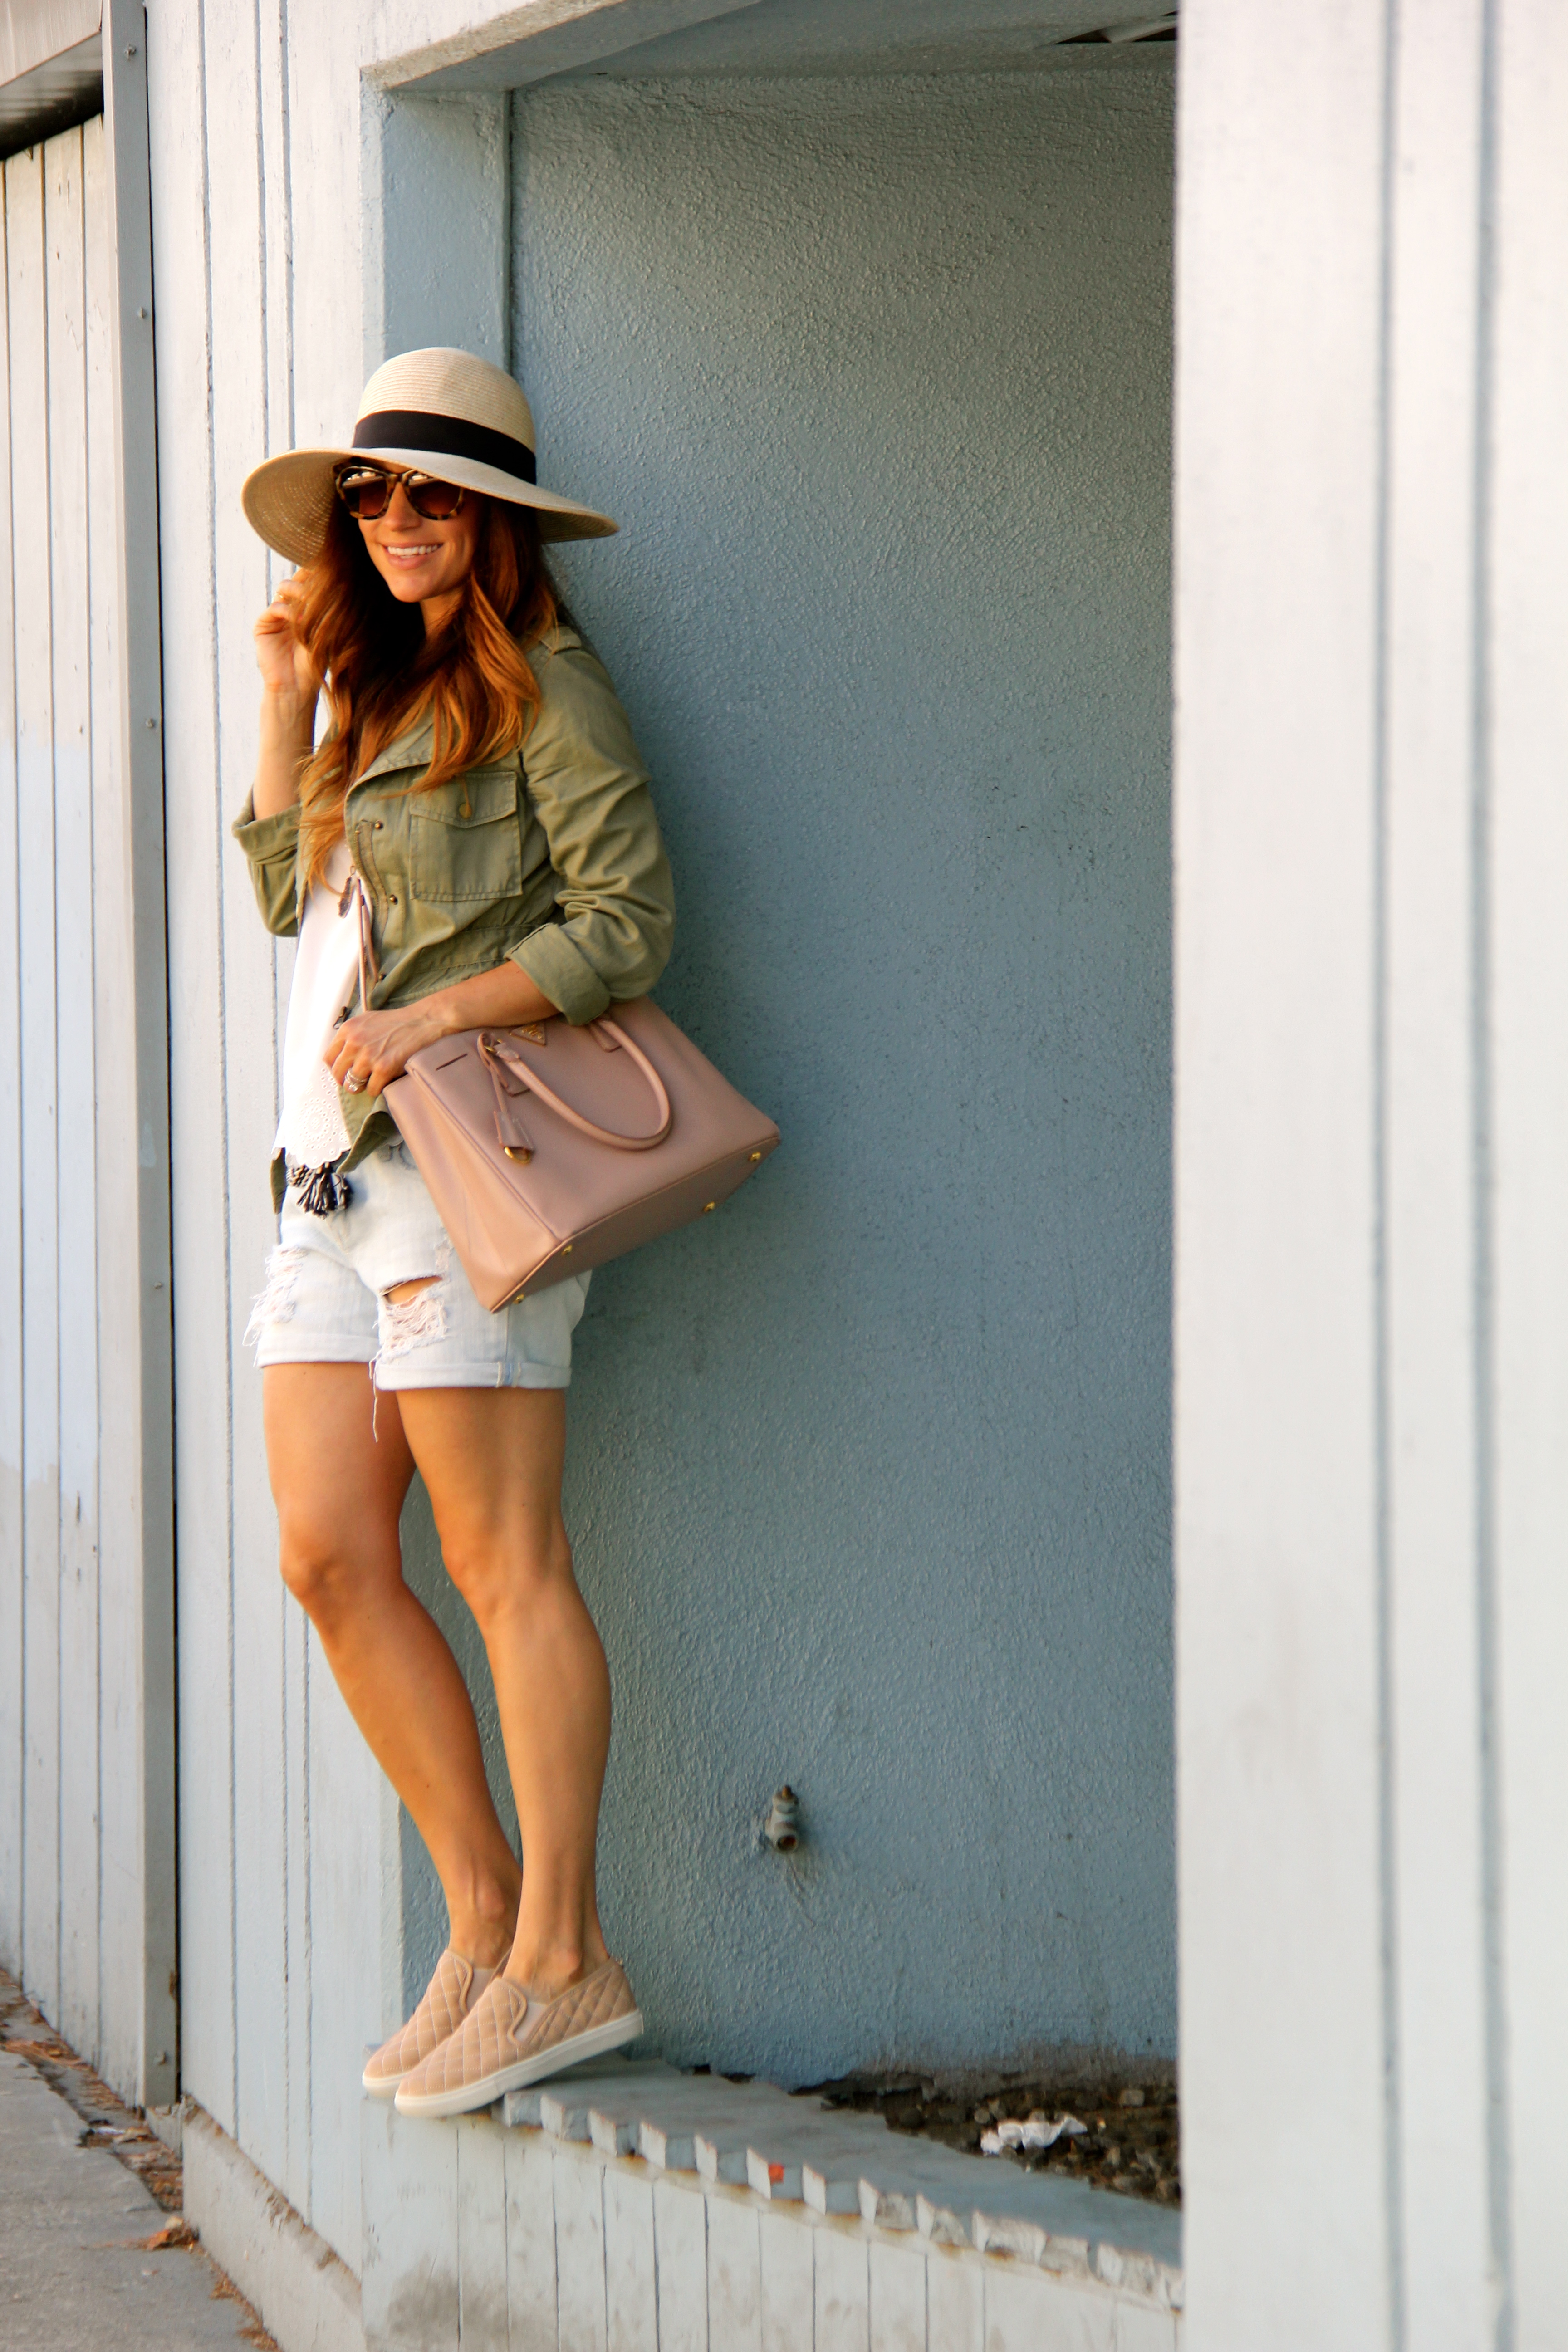
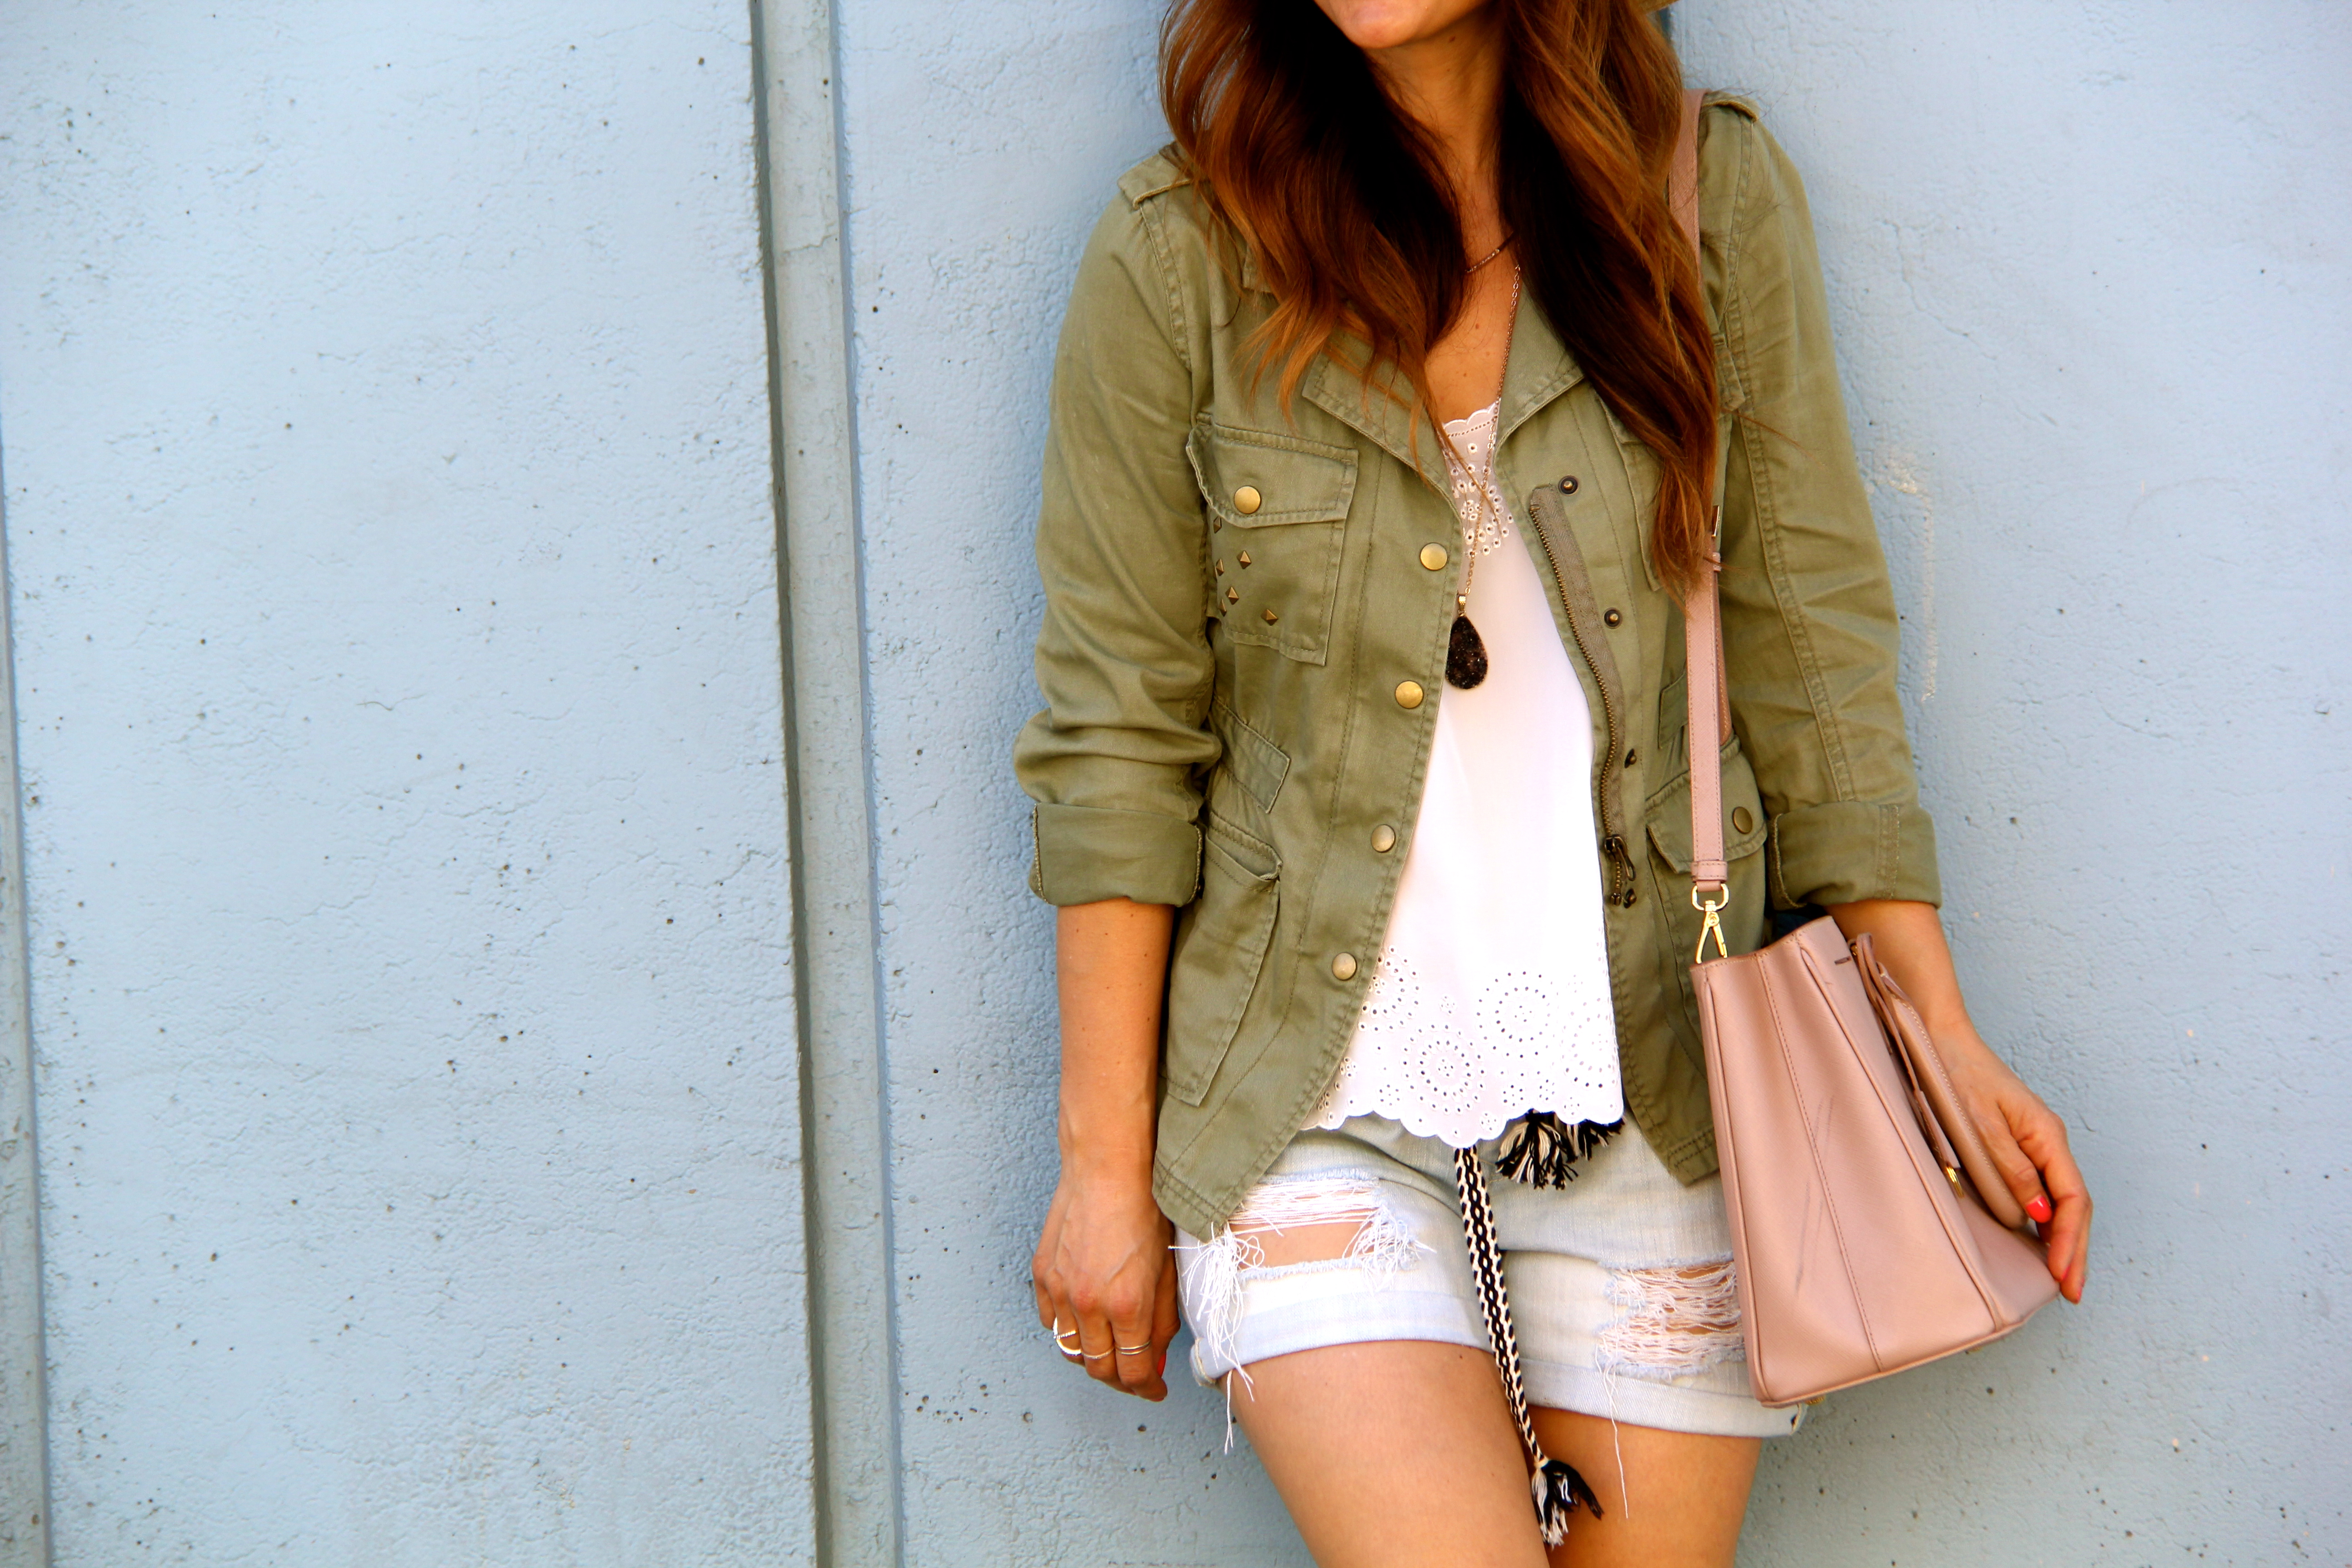
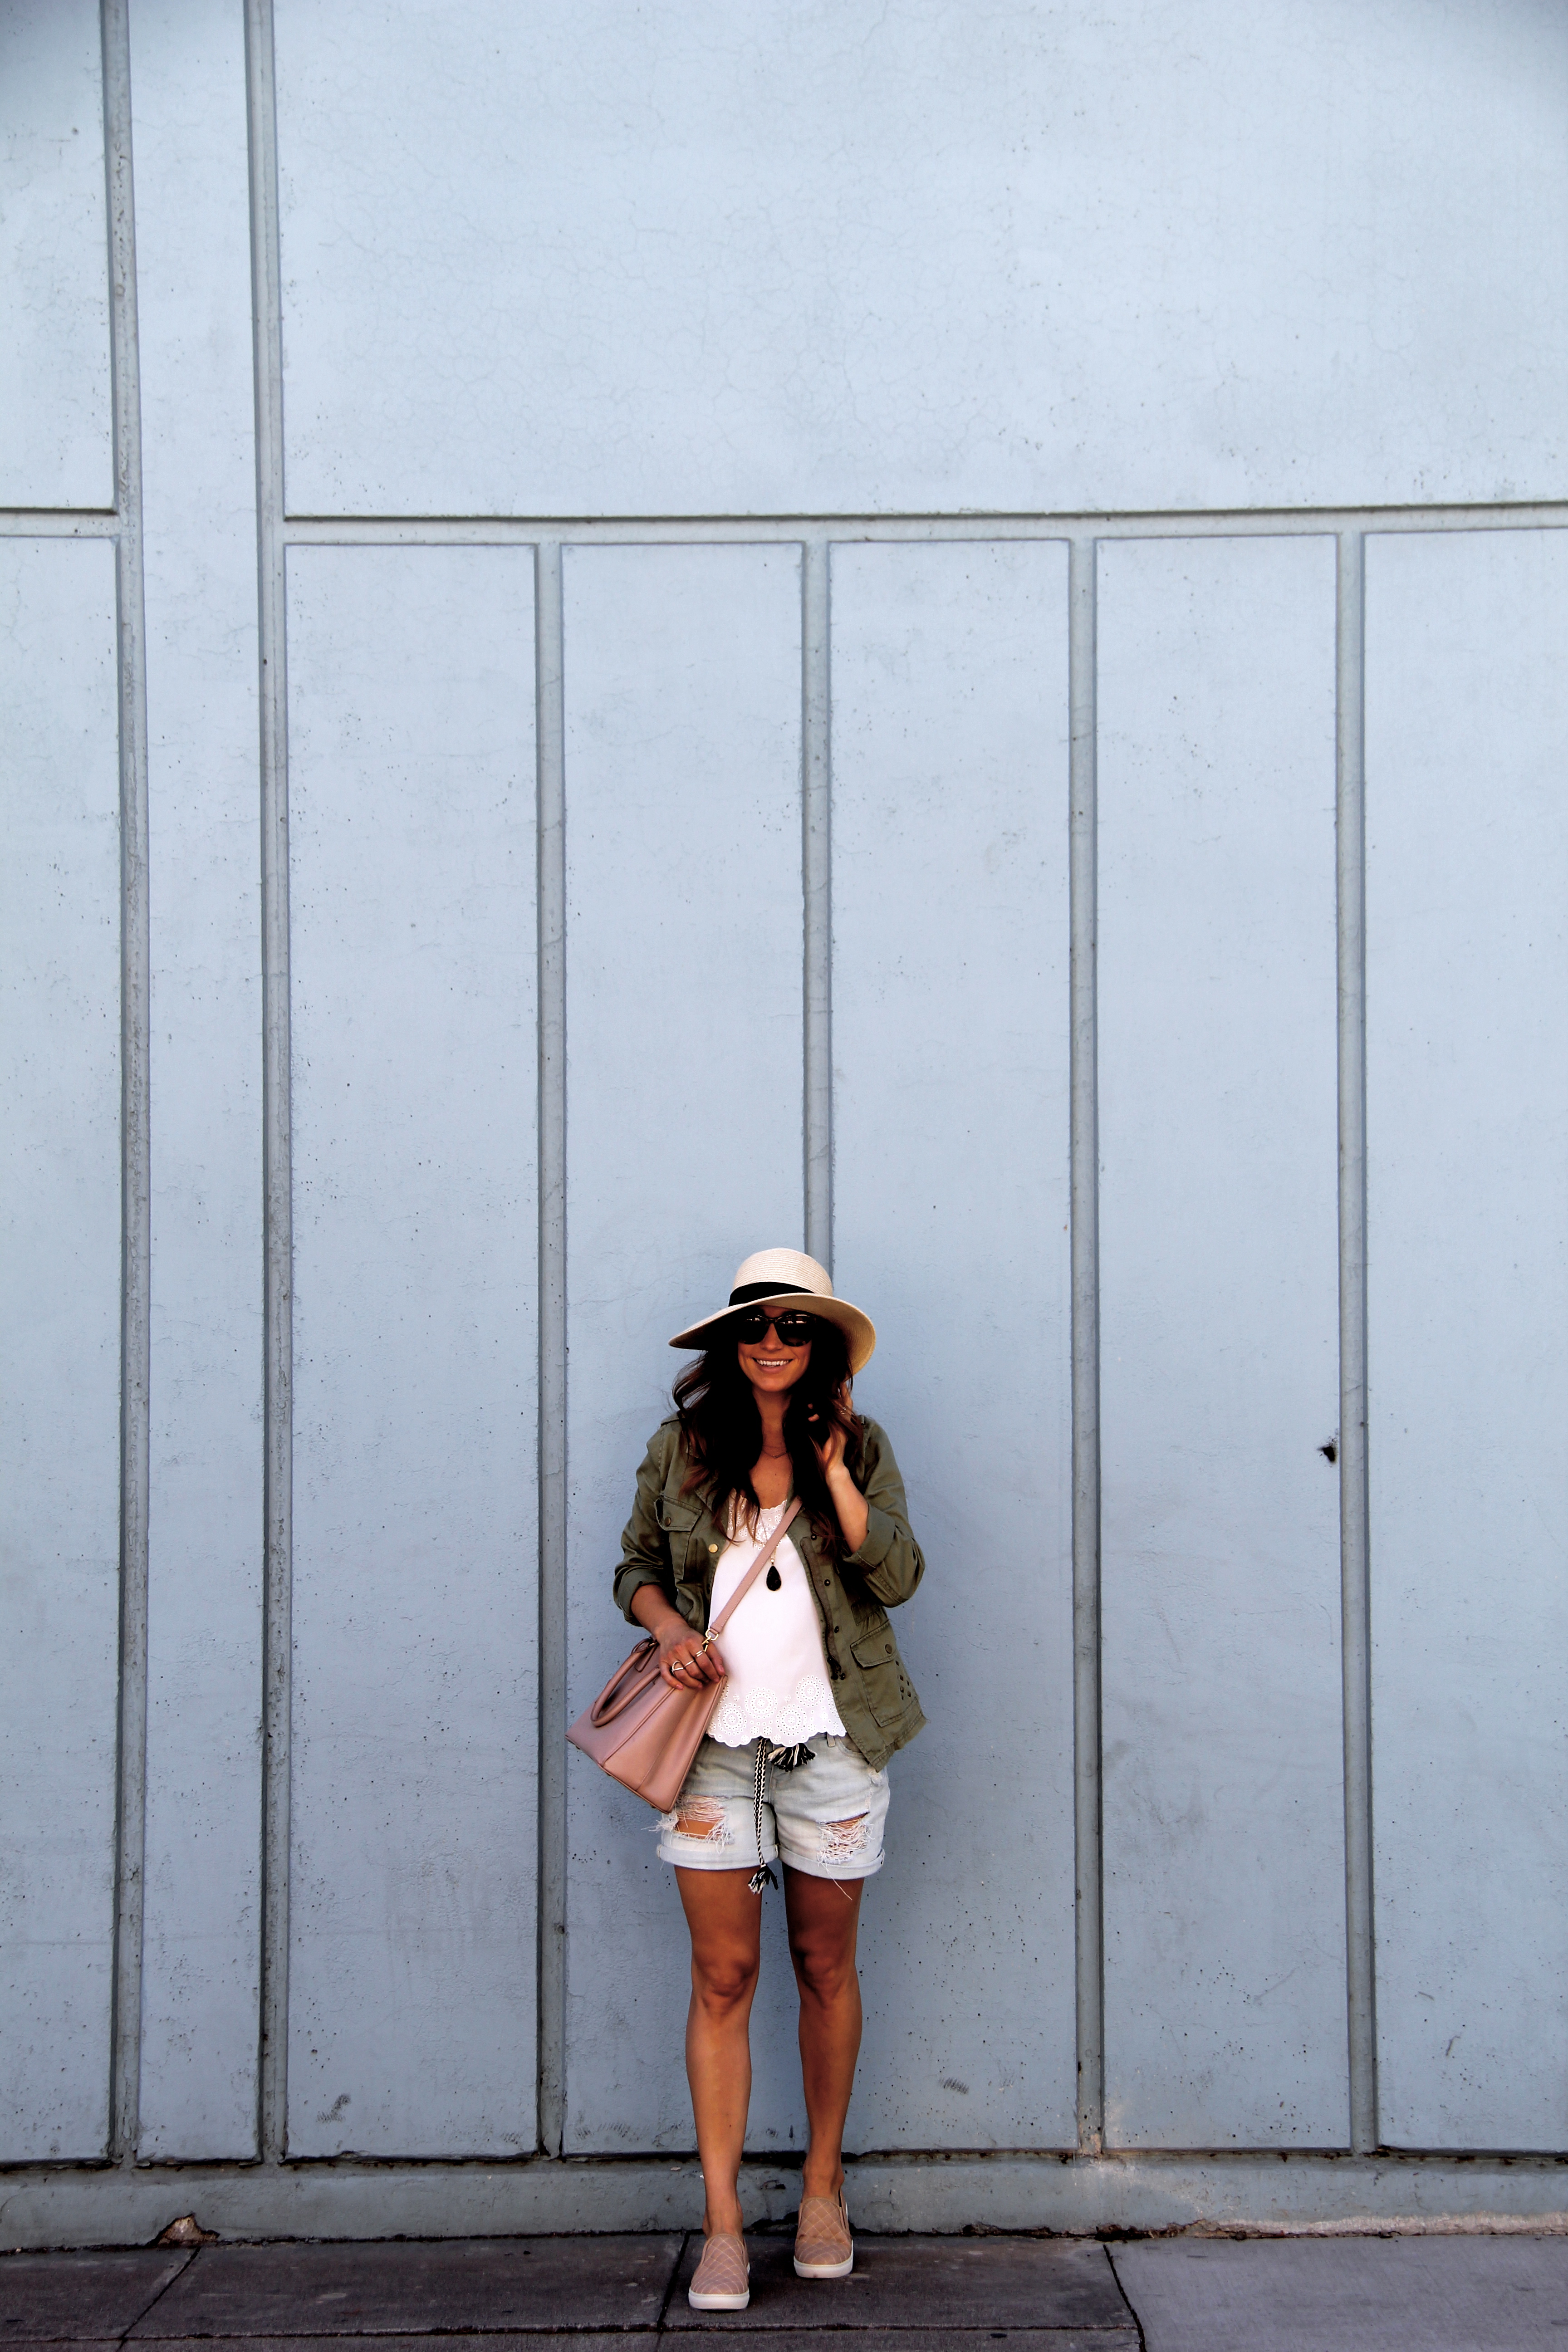


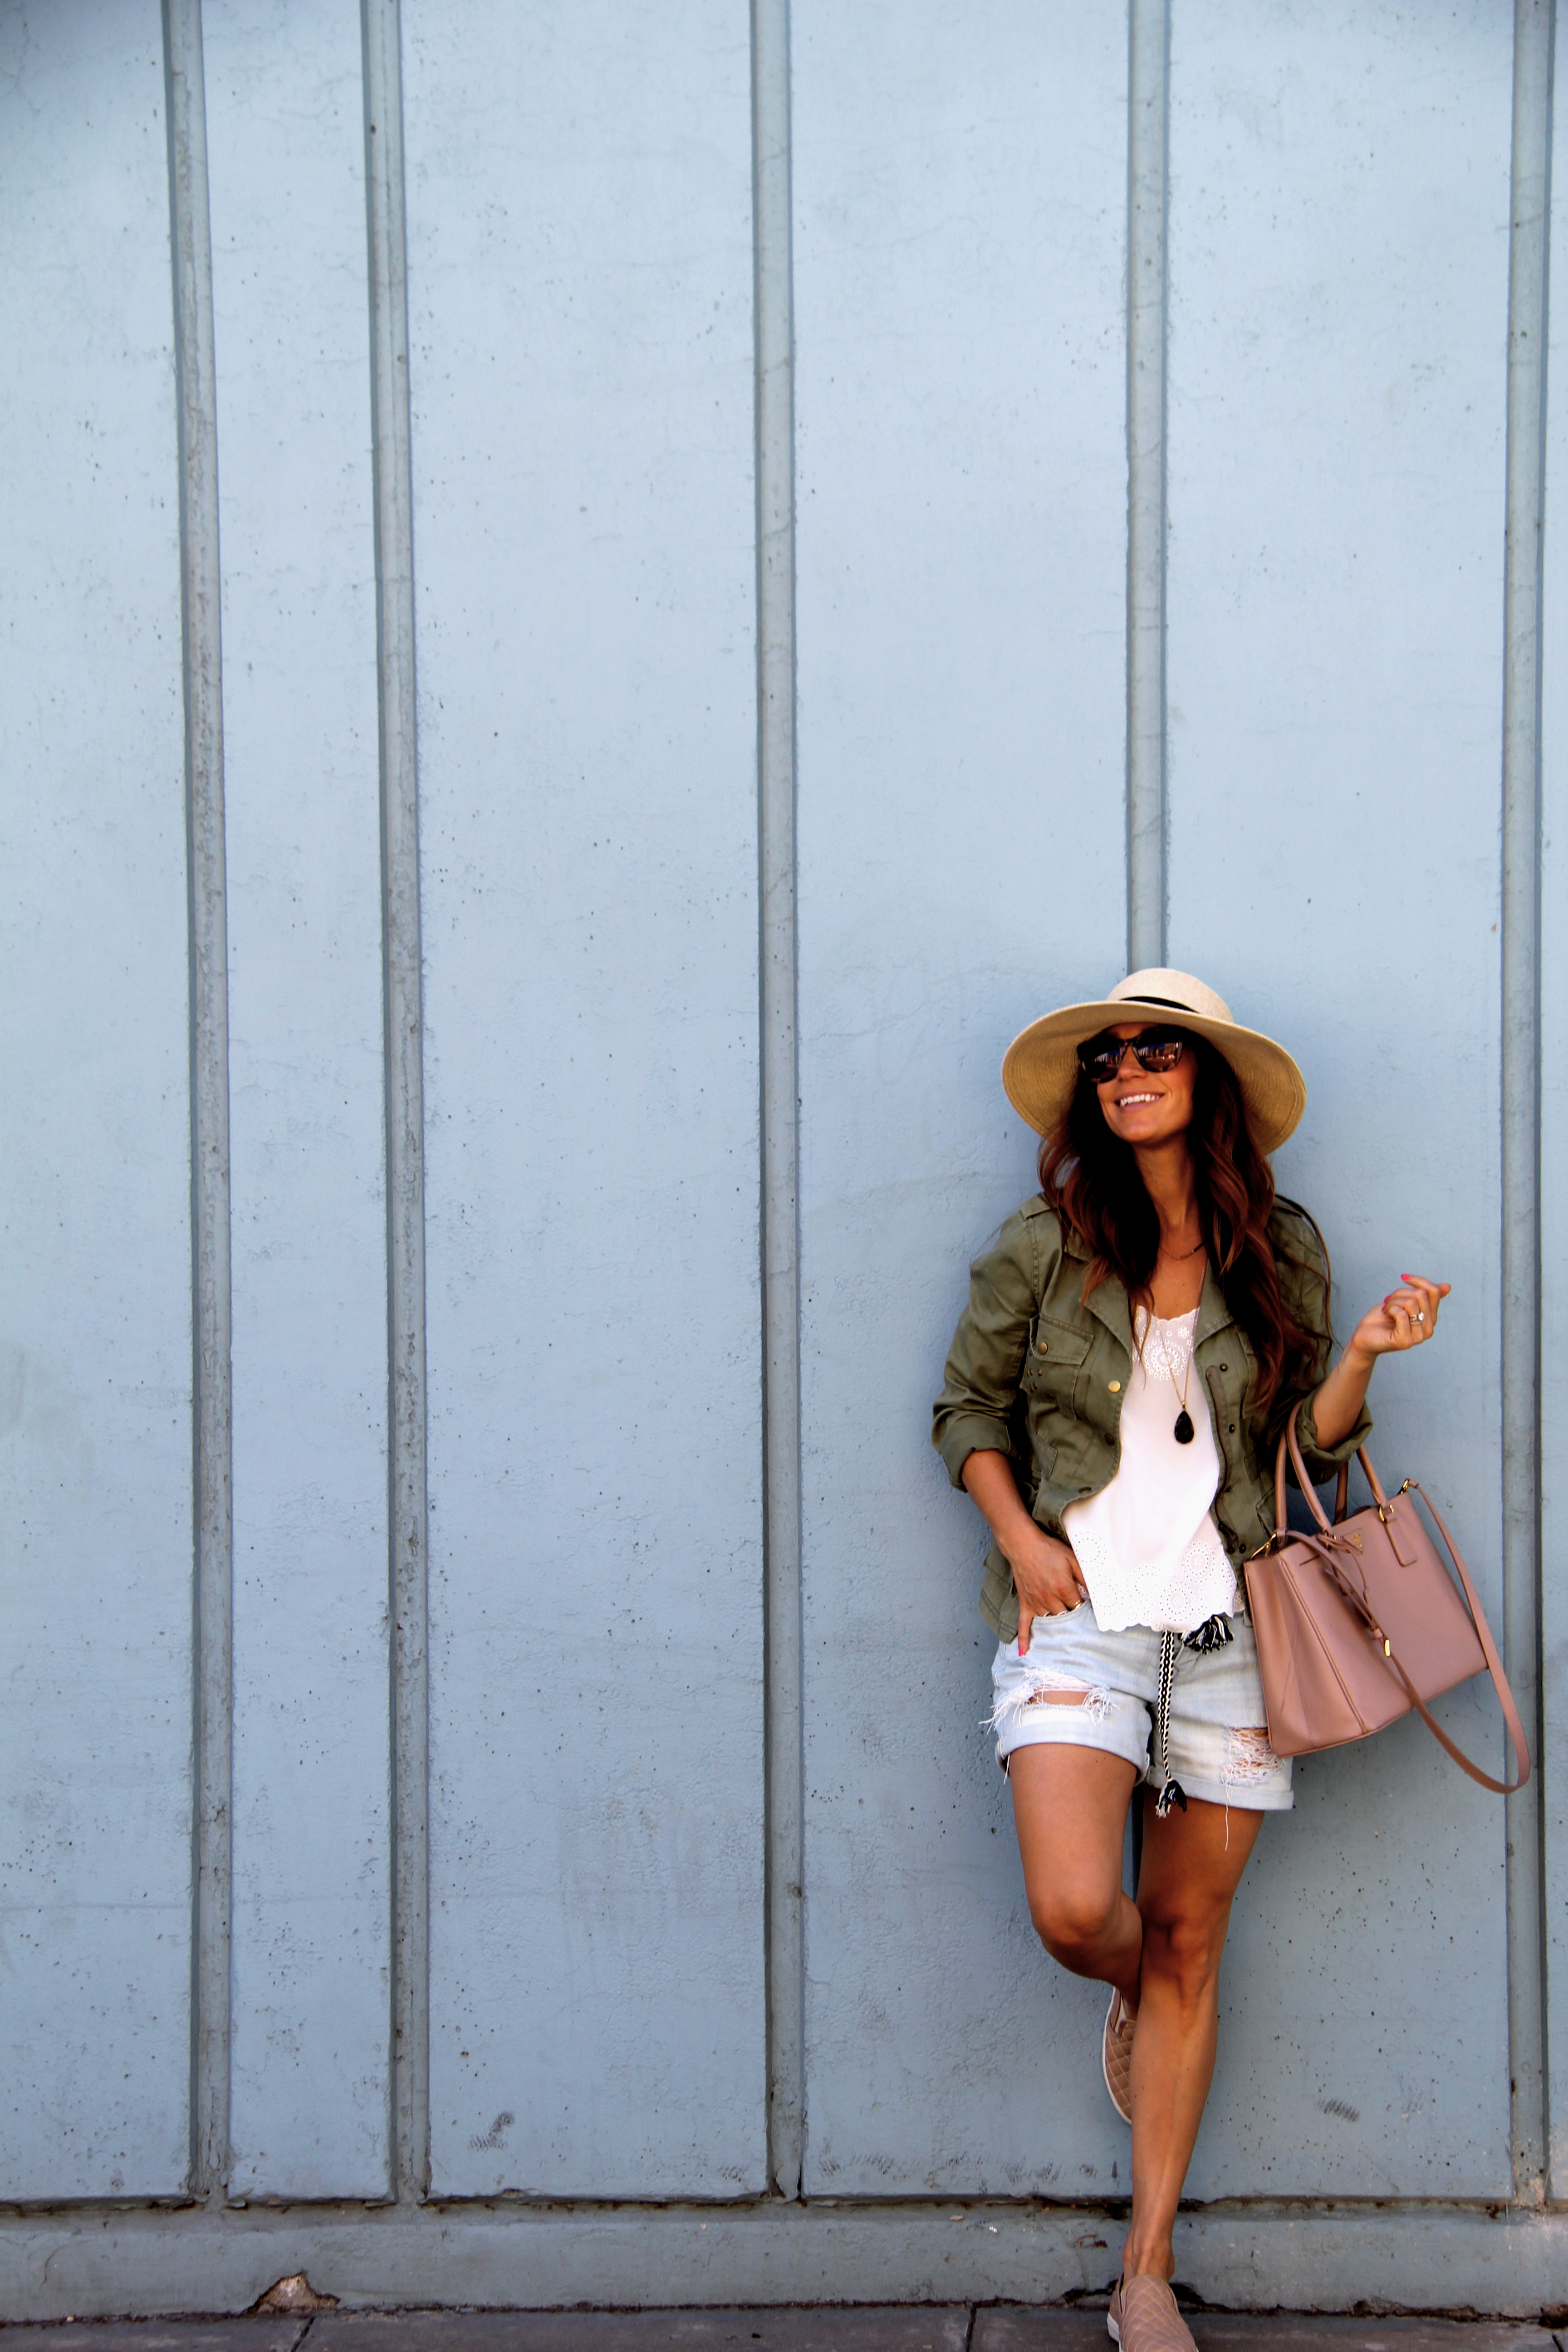 {Outfit Details | Shorts: Old Navy ($9.99!!) | Jacket: Target, old, similar here, here, here | Top: Joie, old, similar here, here | Shoes: Steve Madden | Hat: Nordstrom | Purse: Prada, similar here | Sunglasses: Anthropologie | Cross Ring: BaubleBar | Bar Necklace: Gorjana}
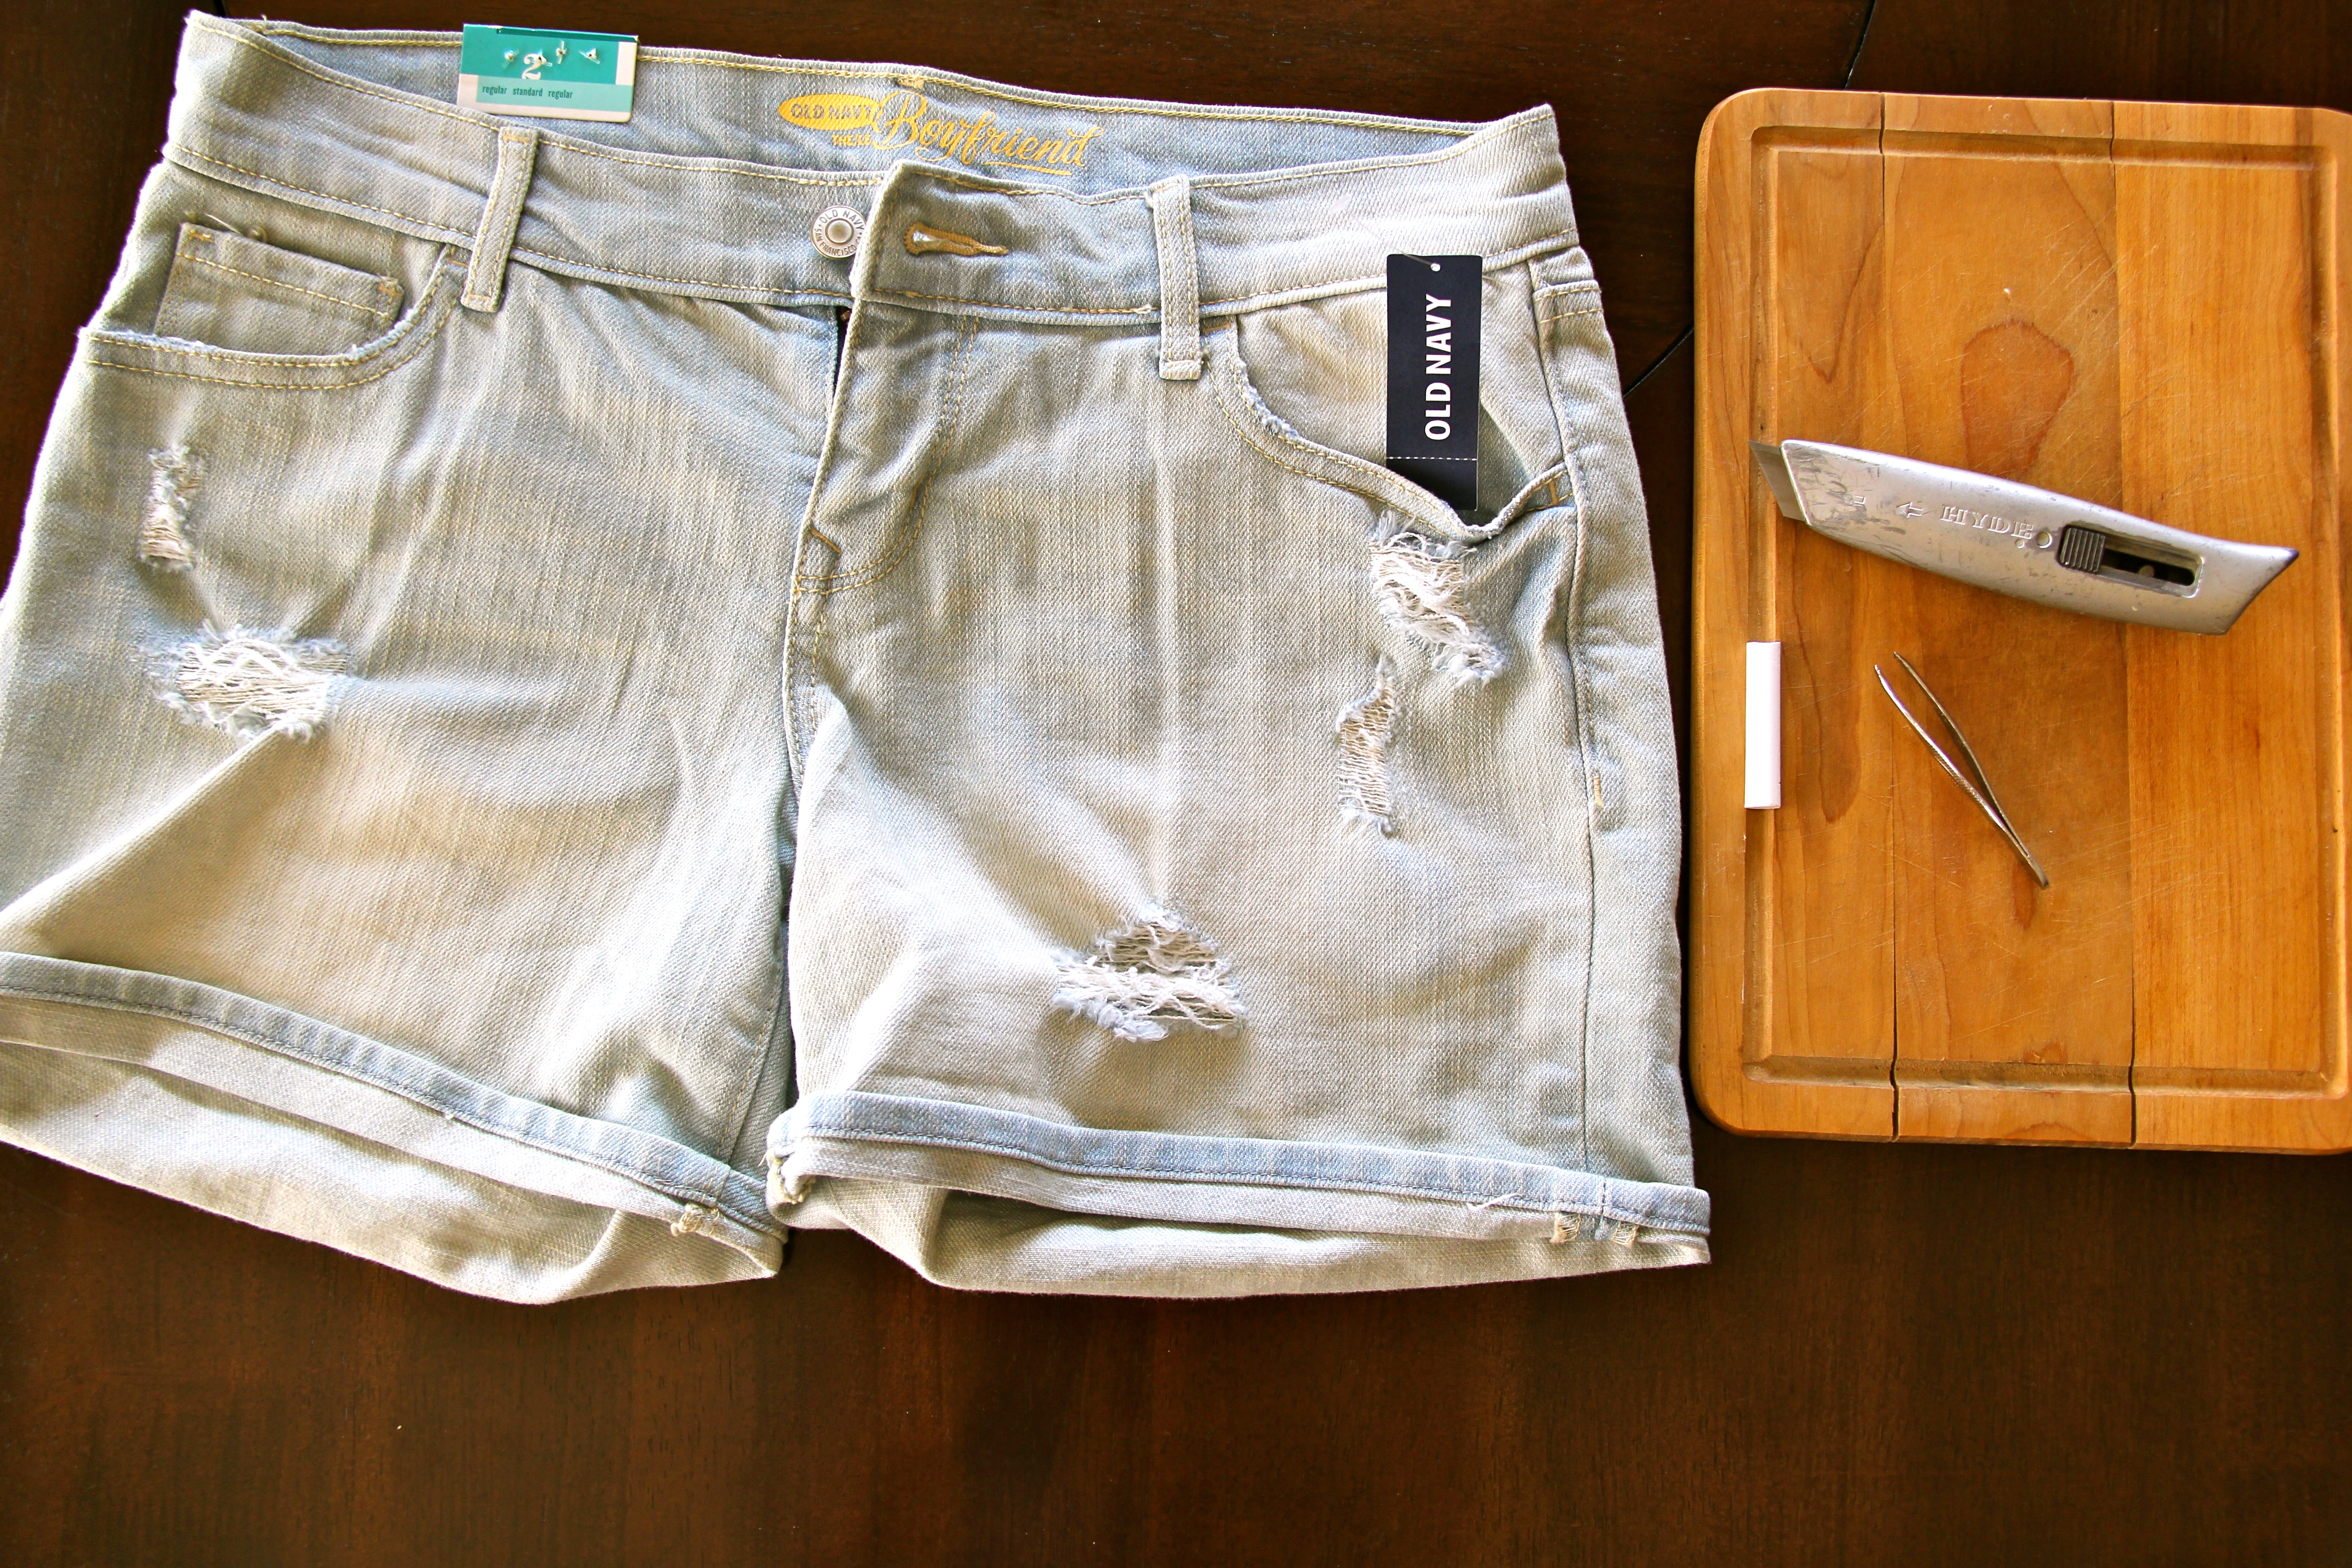
DIY DISTRESSED DENIM SHORTS
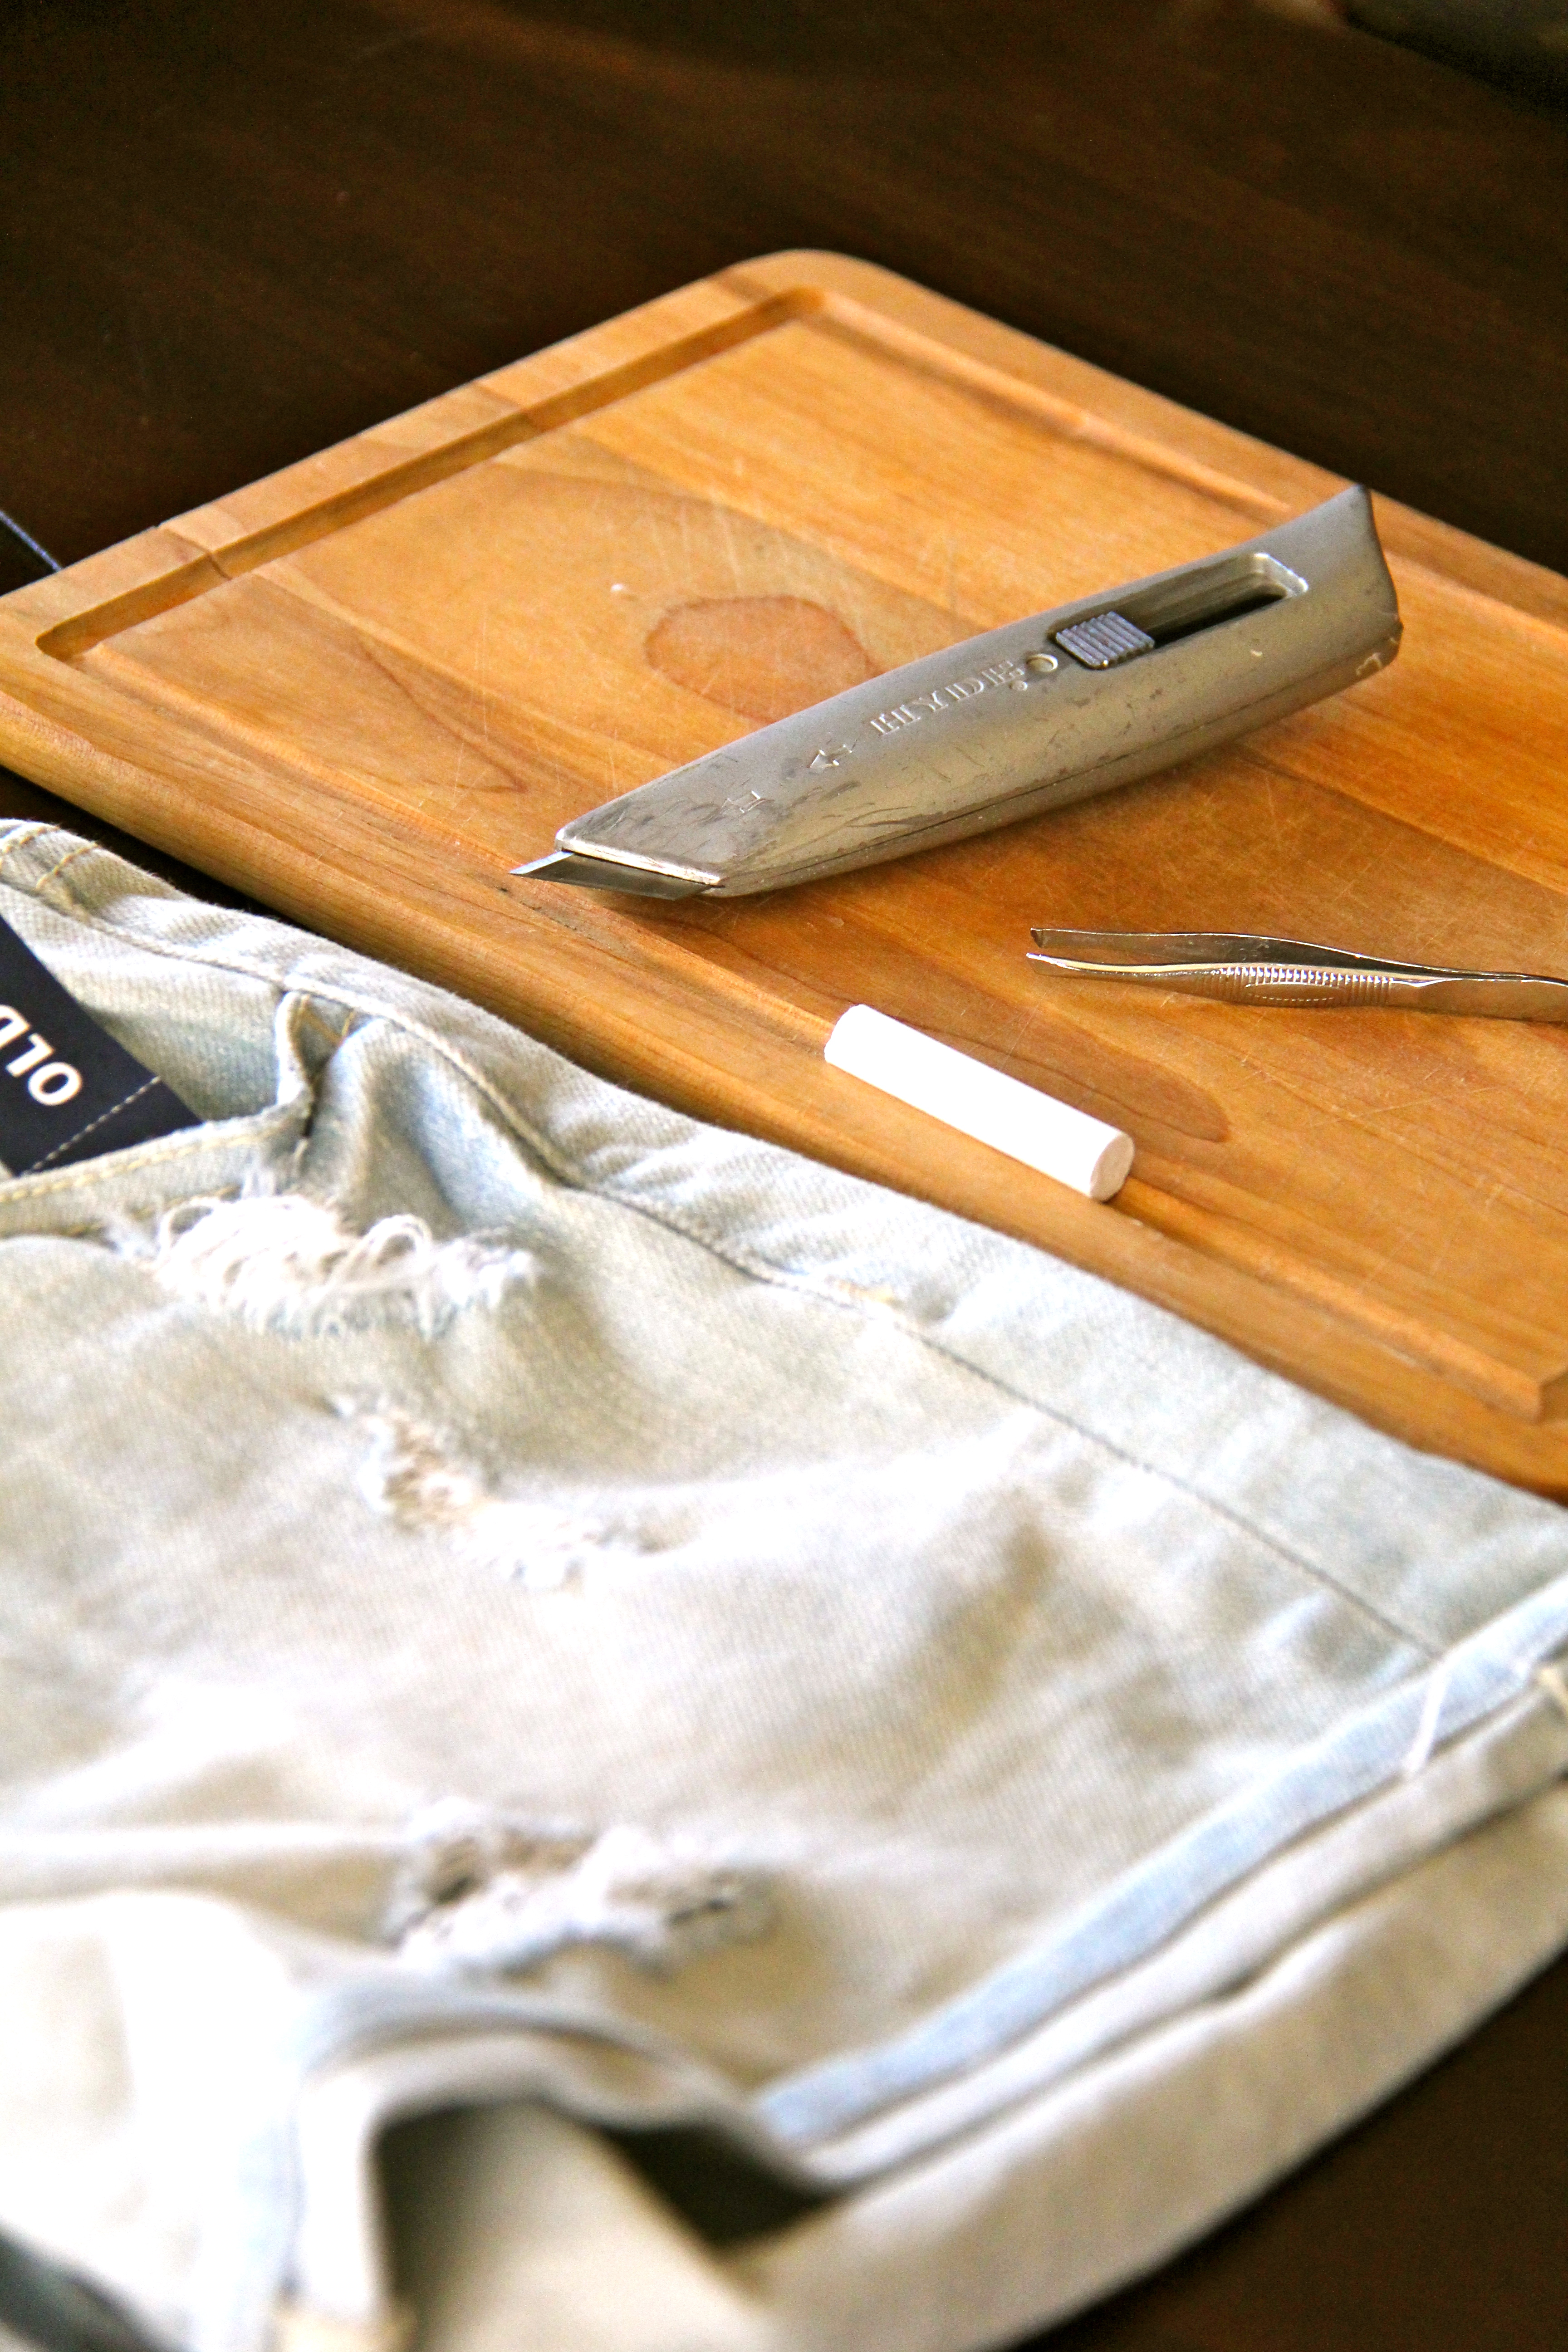
MATERIALS:
-boyfriend denim shorts (Old Navy pair)
– utility knife
– tweezers
– cardboard or cutting board
– chalk
(***I found my inspiration, and borrowed different steps from different DIY tutorials on Pinterest… this was how I achieved the finished product)
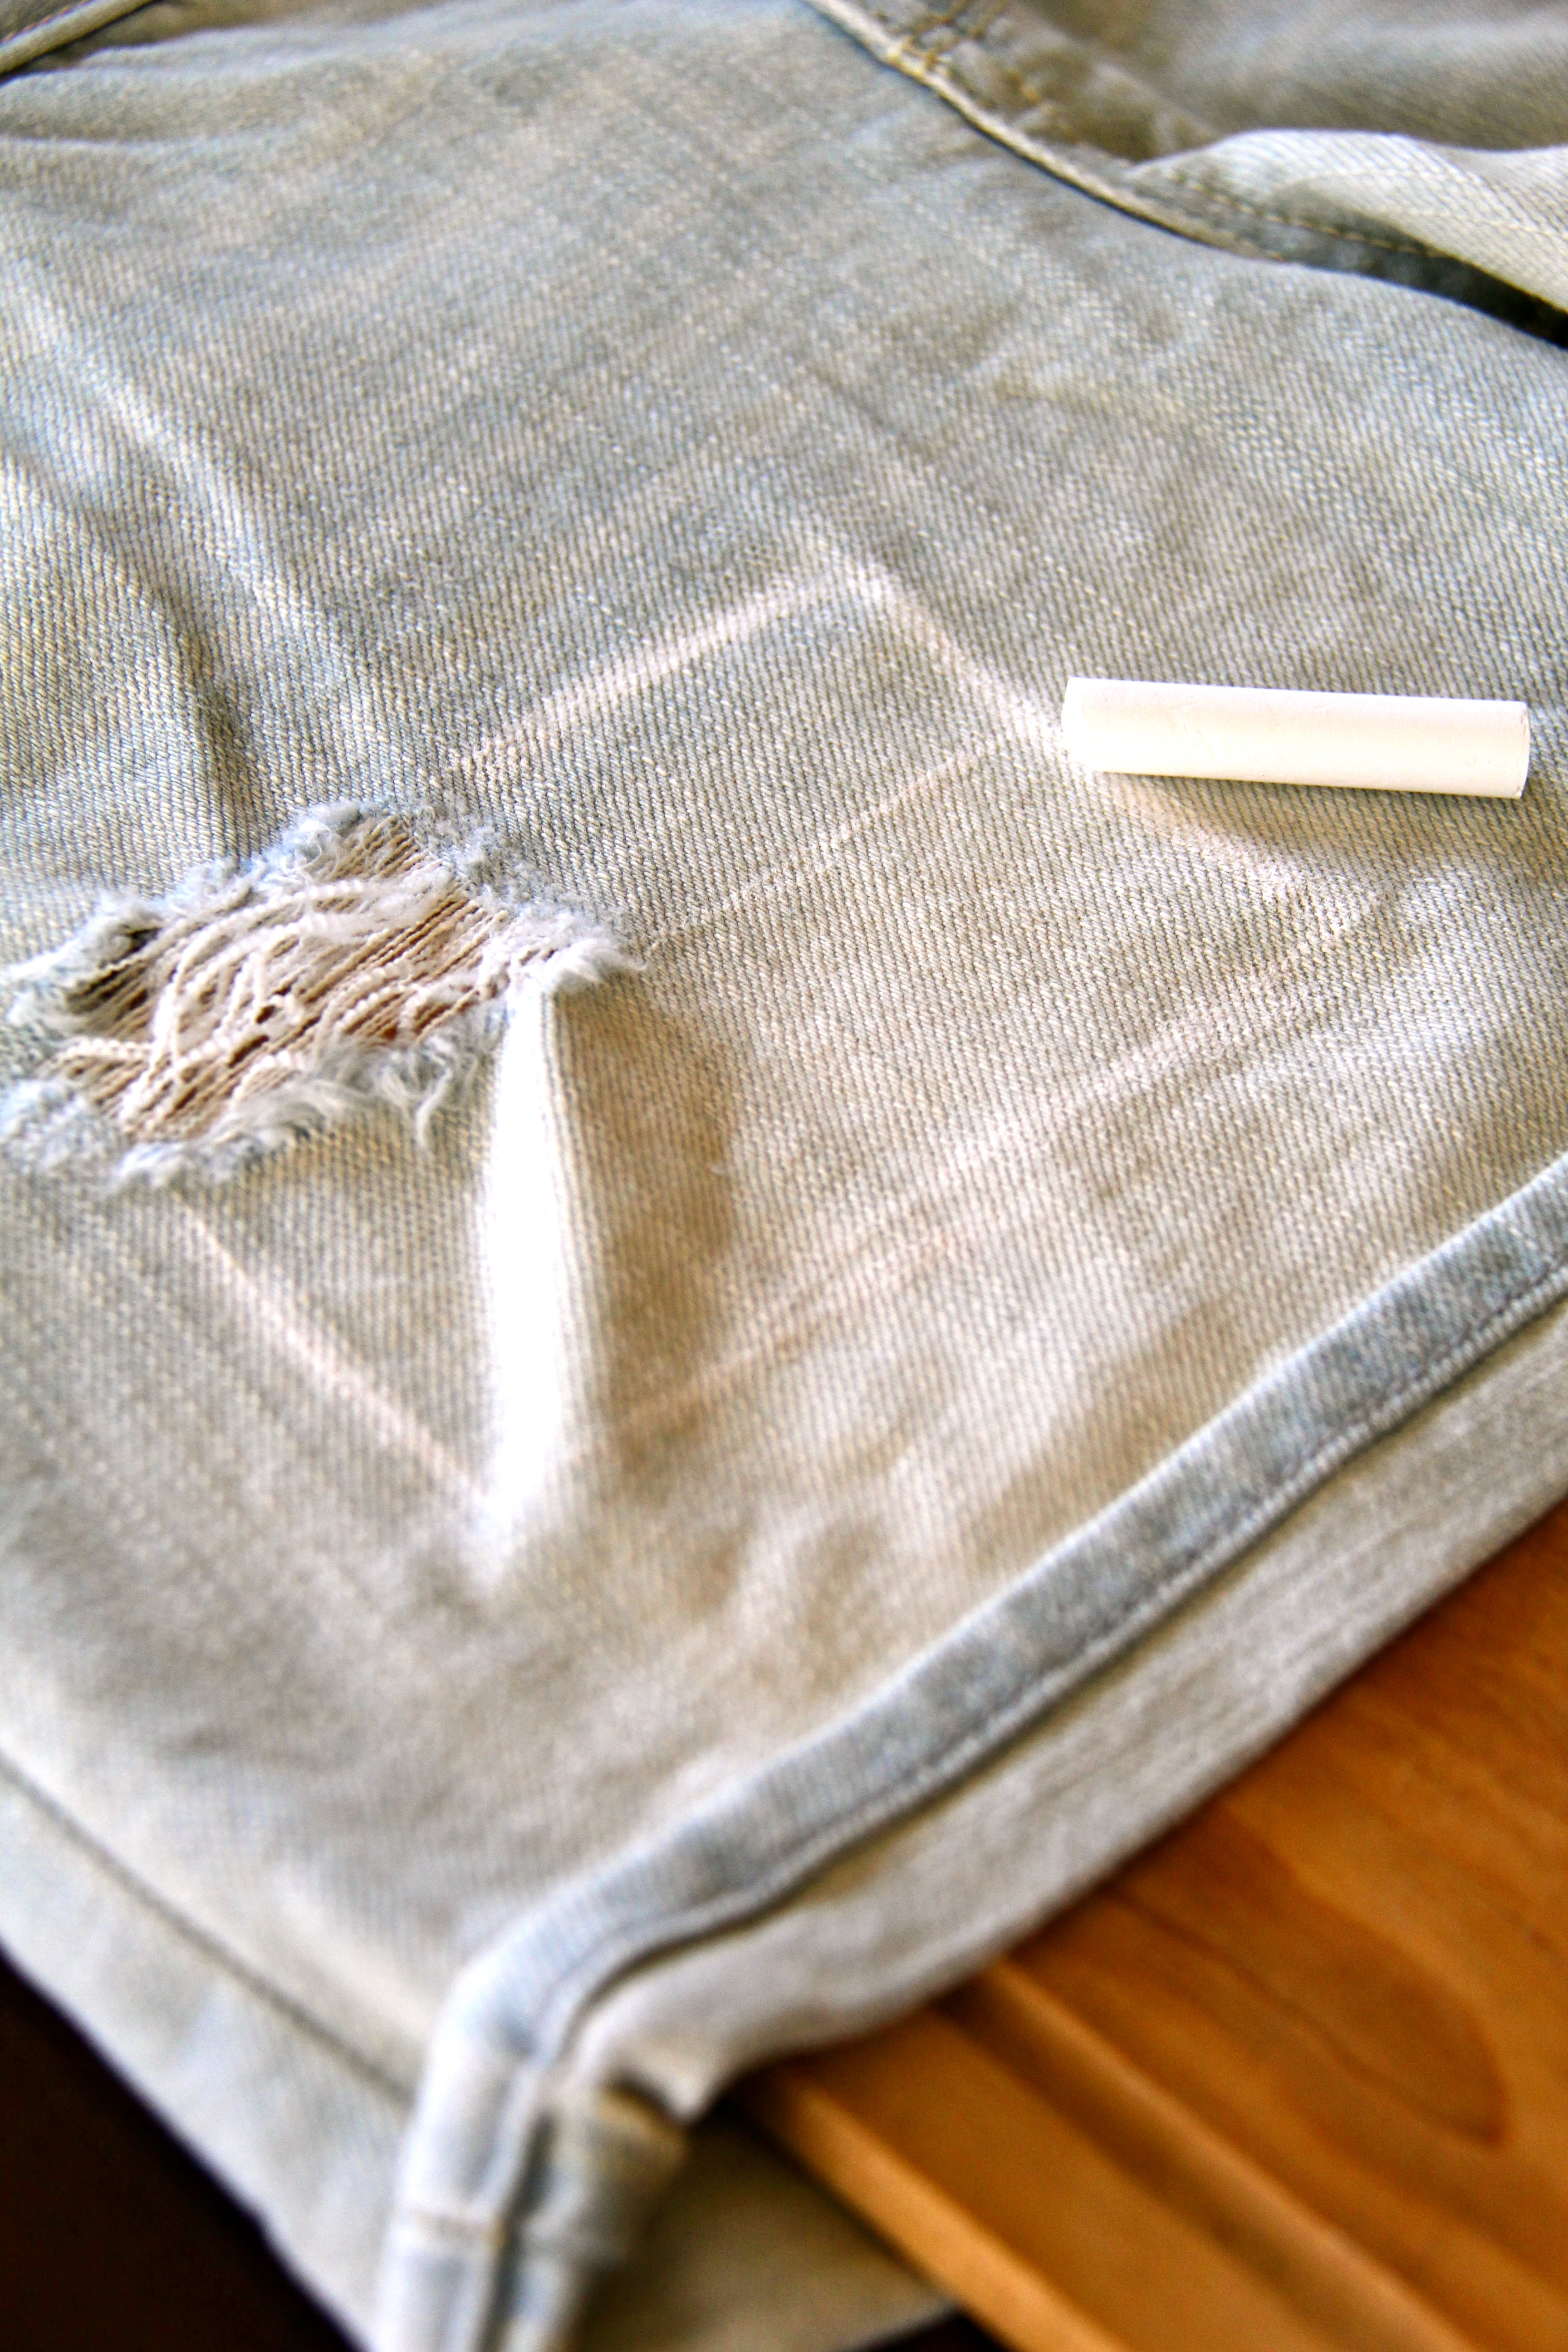
Step 1: Take your chalk and outline an area that you would like to distress. One way to find inspiration is to look on Pinterest, or to search stores you like for examples (that’s what I did :))!
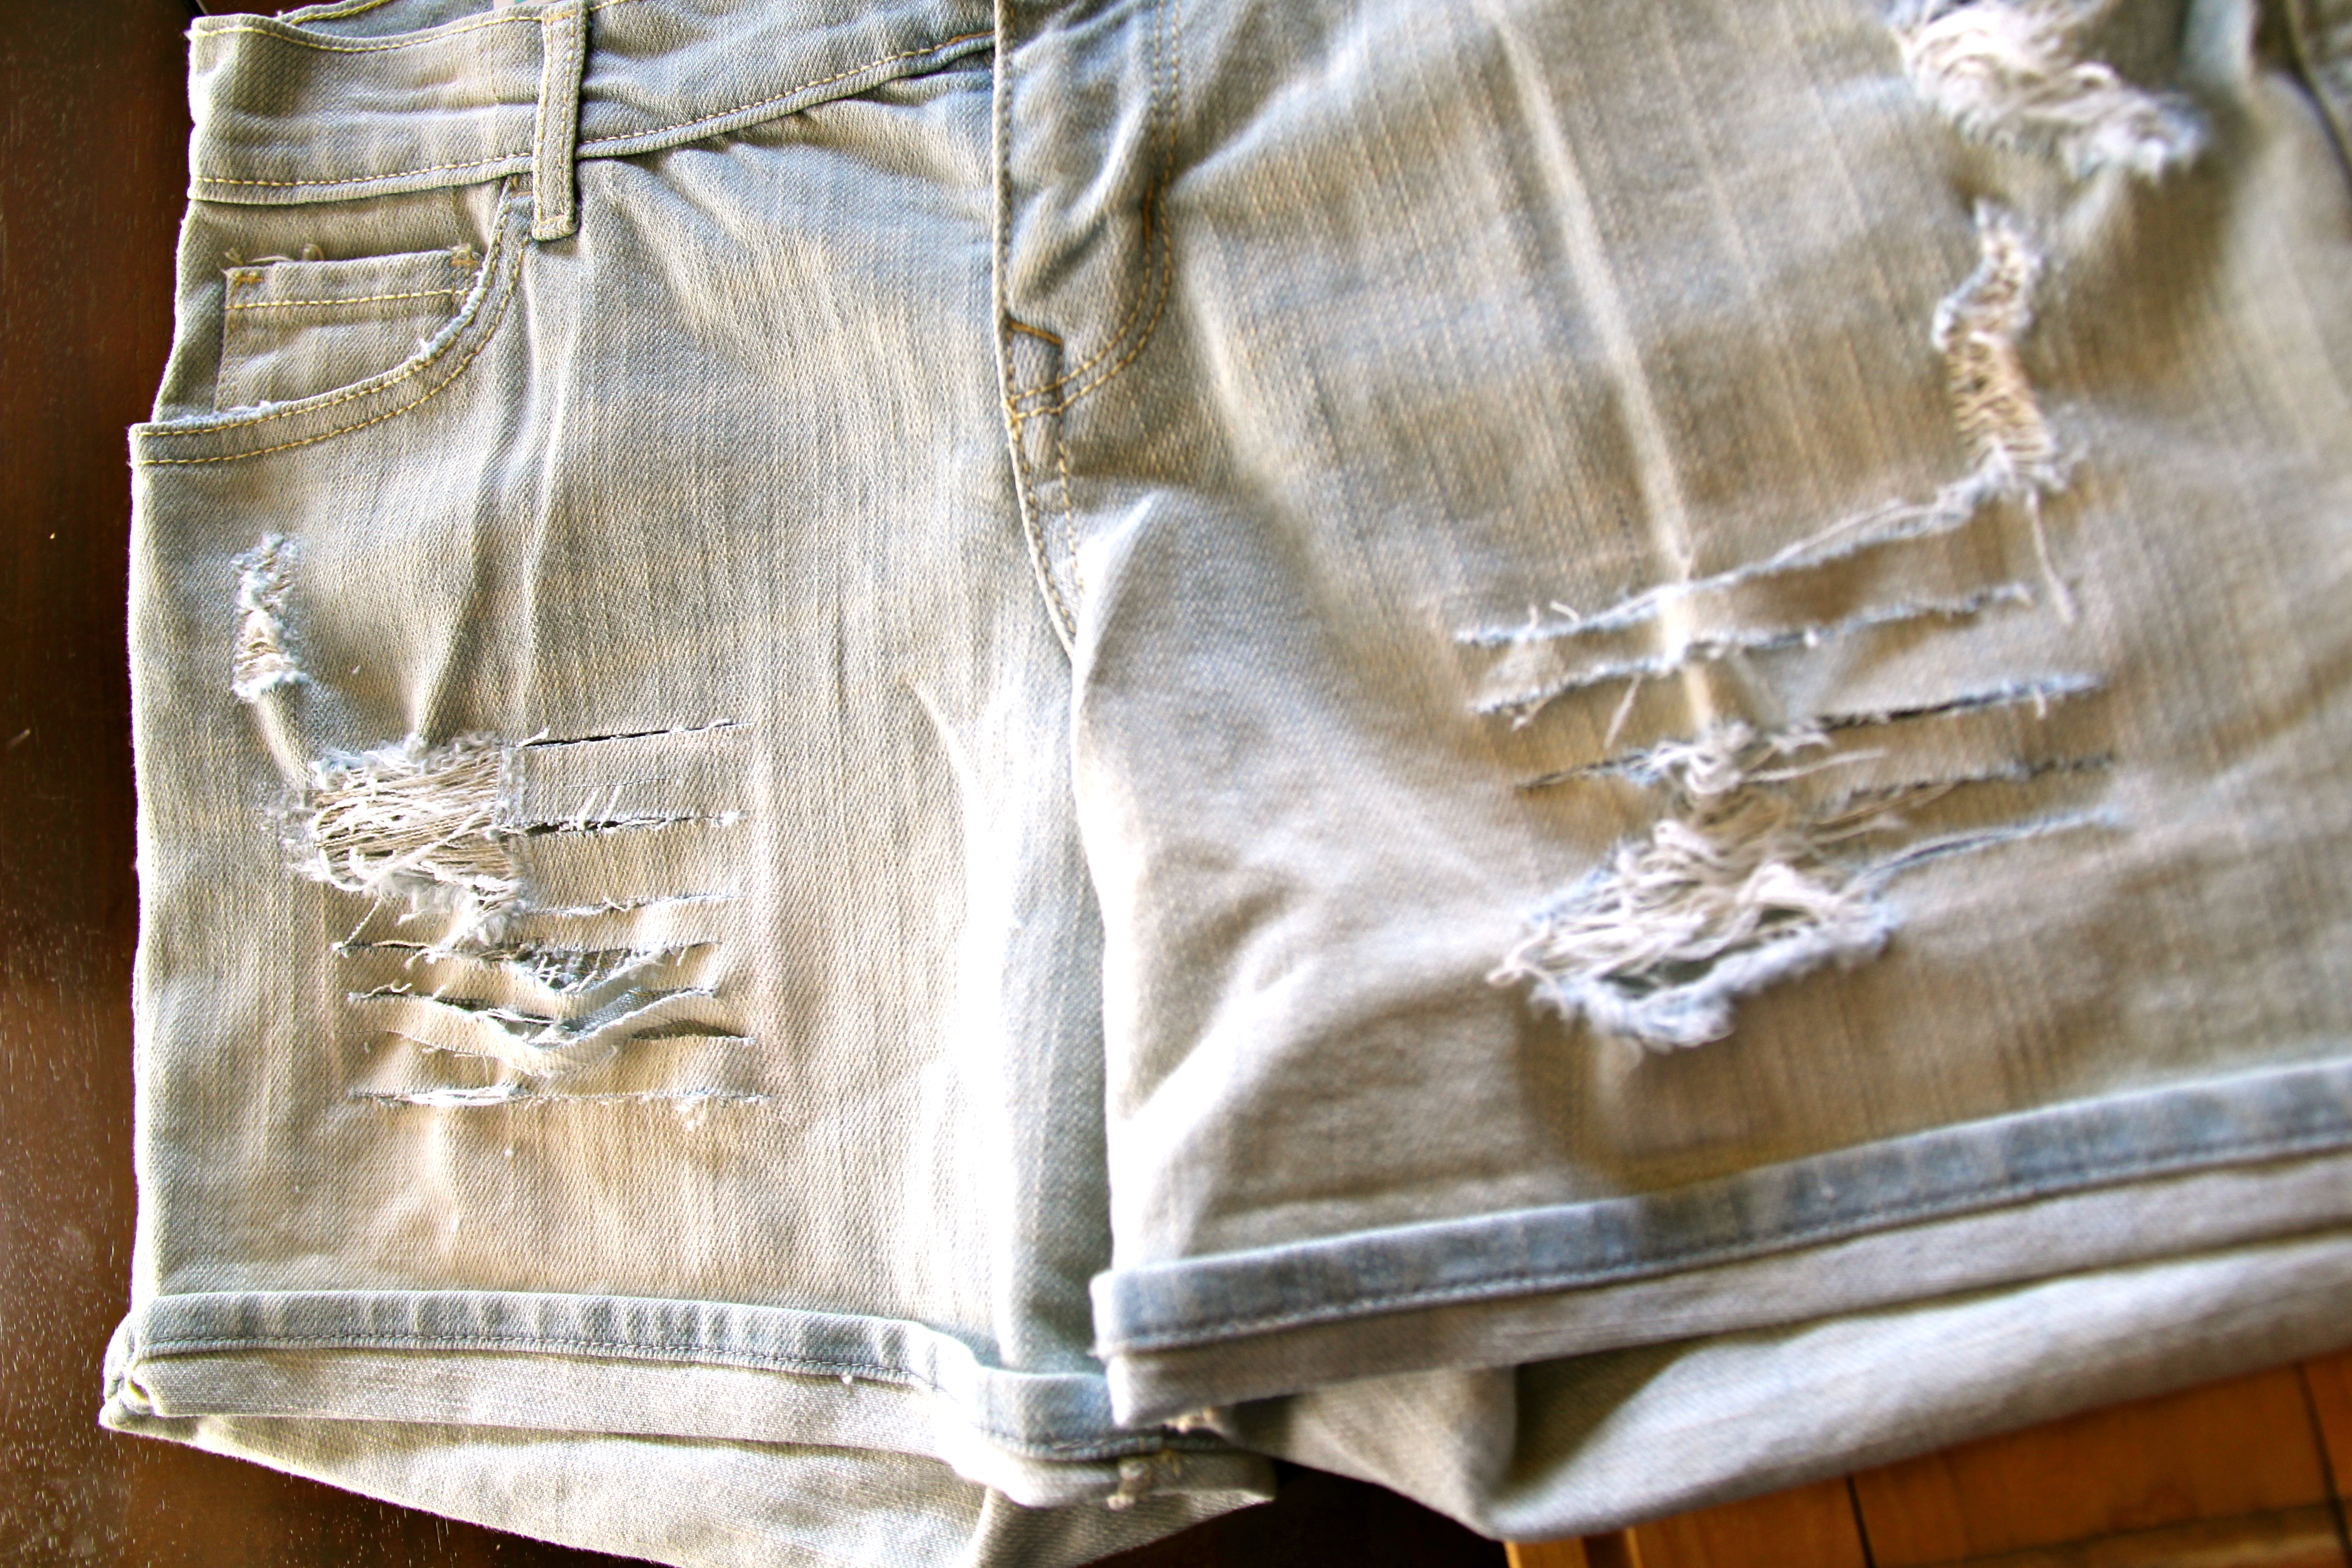
Step 2: Before you take that utility knife near your shorts be sure the pockets are out of the way! Next, using the utility knife, cut horizontal, parallel lines within your drawn boxes about 3/8″ apart.

Step 3: Toss them in the washing machine, based on care instructions. After they have washed, toss them in the dryer.
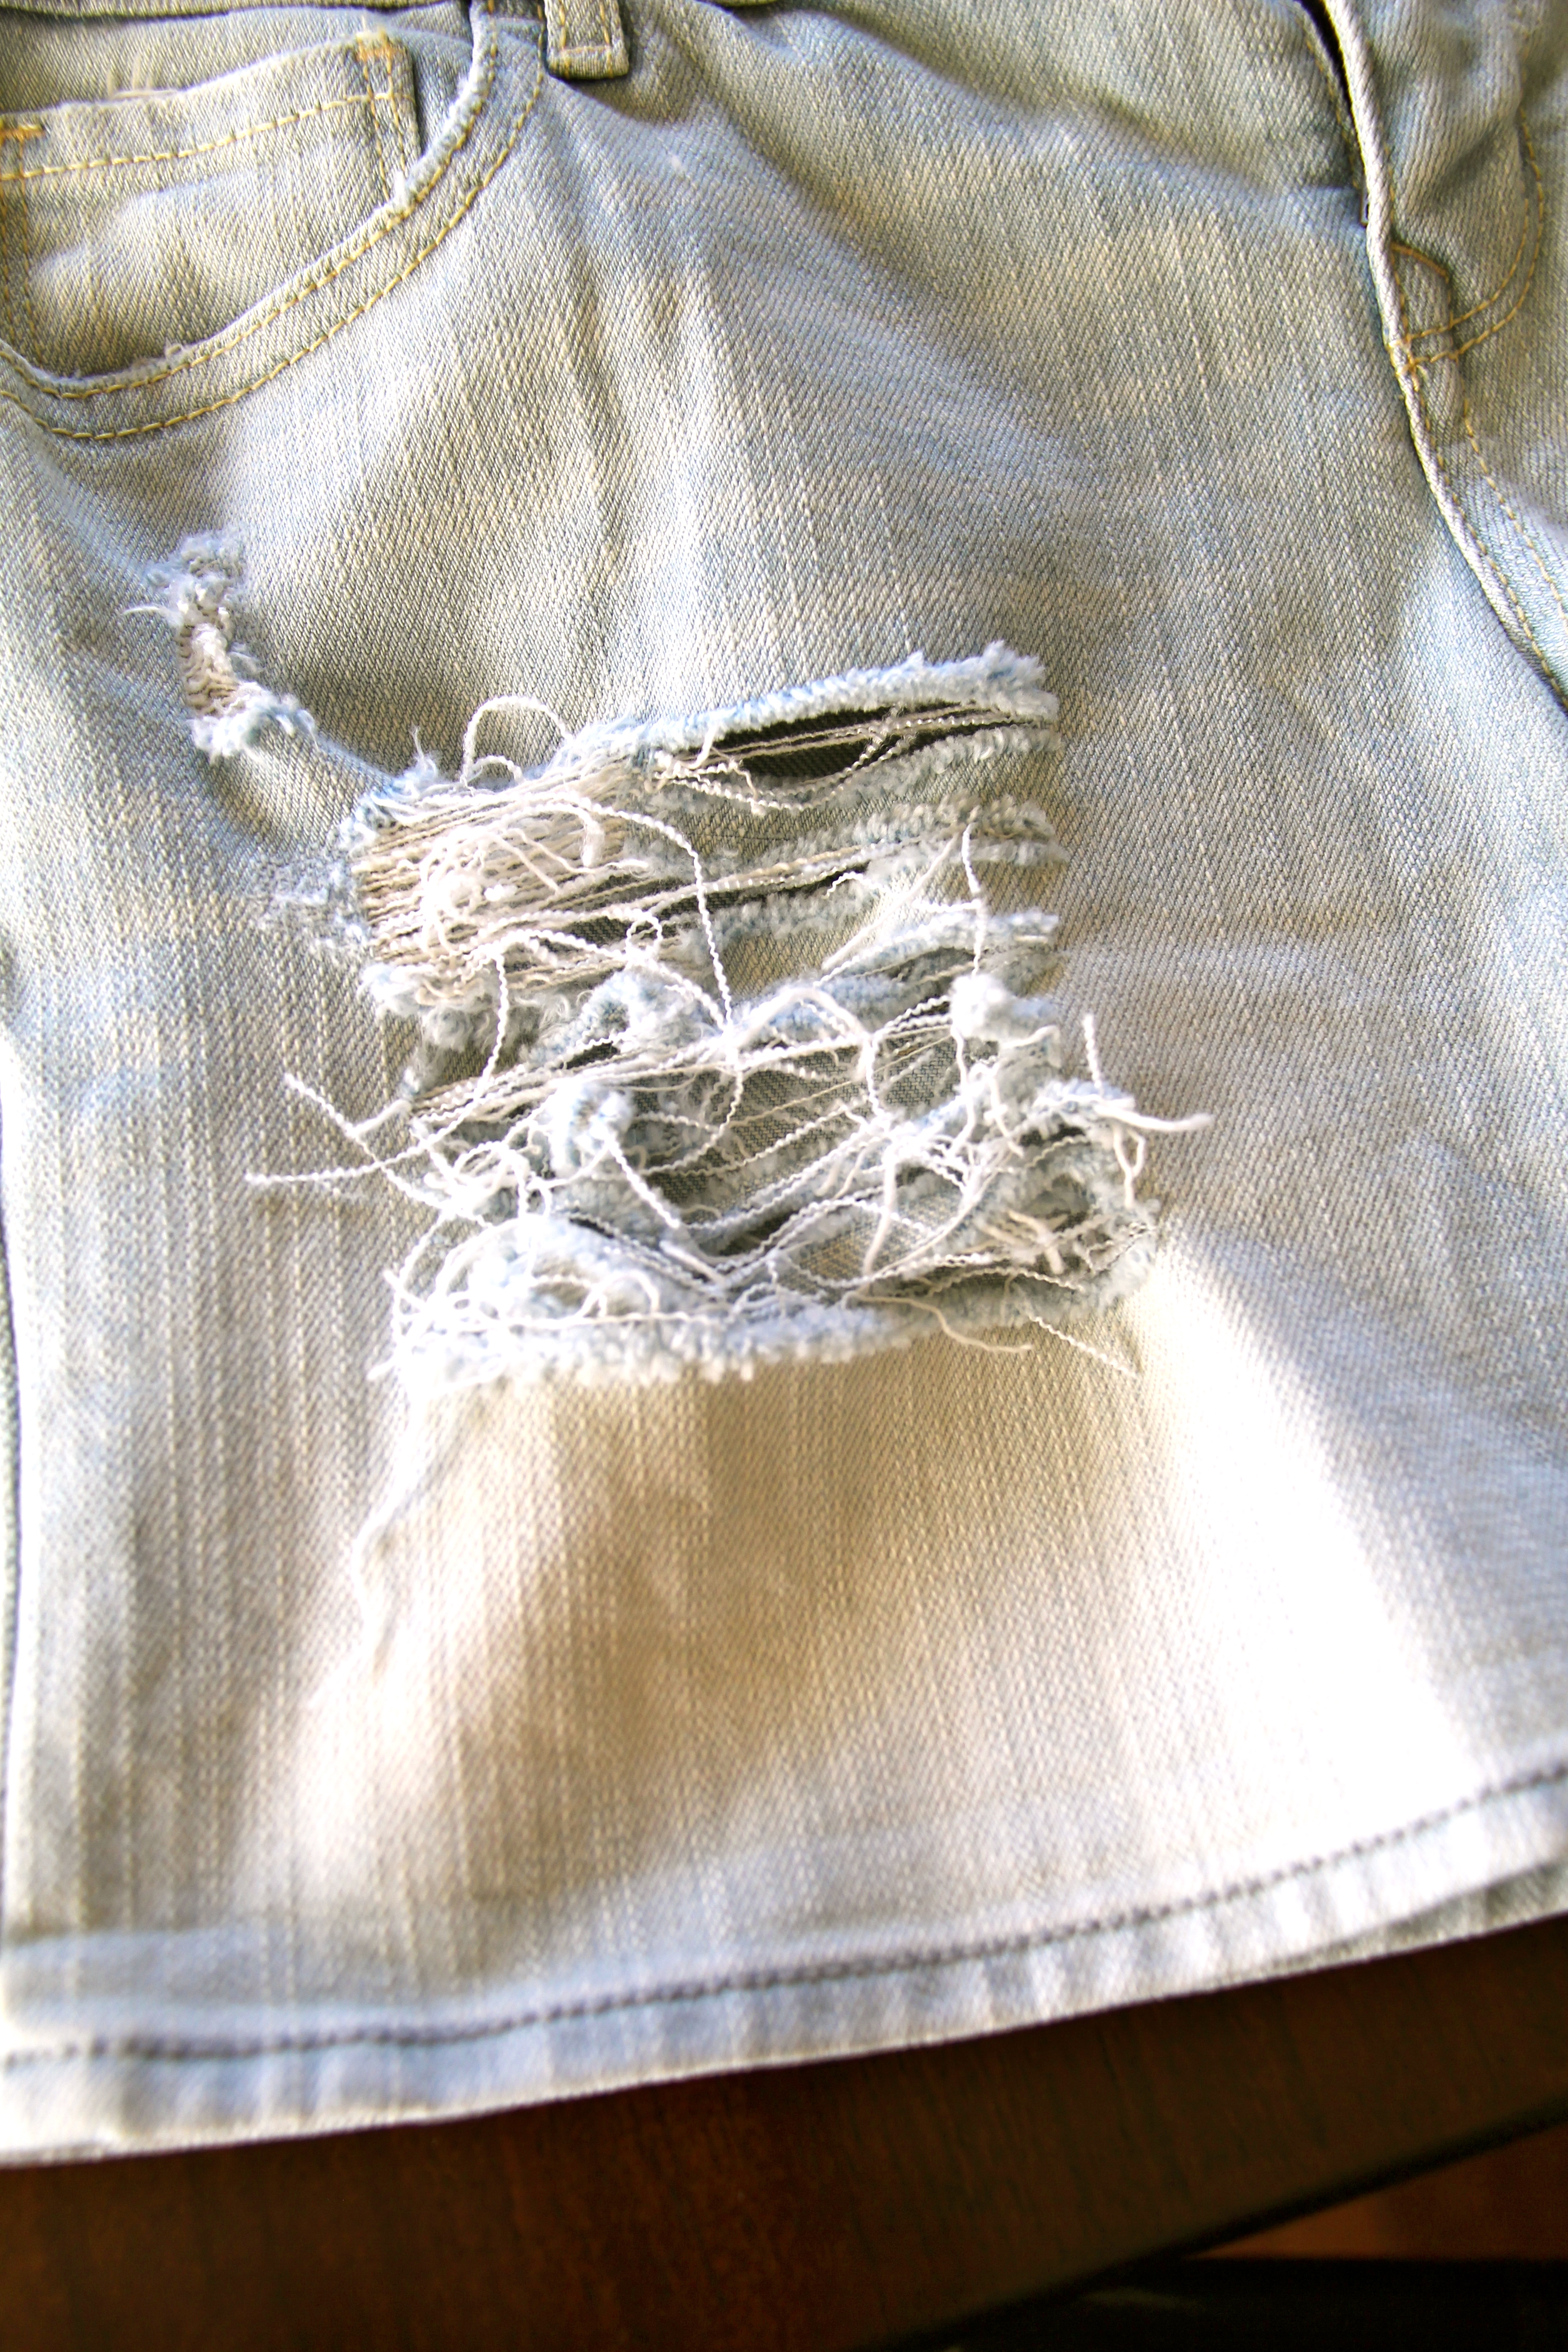
Step 4: This is the tedious and time-consuming part. I recommend pouring yourself a glass of wine, putting on a good Rom Com, grab your tweezers, and start to pull the indigo fibers using tweezers, leaving the horizontal white fibers. This is how the natural look is created. It is also why, I realized, distressed denim costs so much!! All in, the project took me about an hour! Not to brag, but I’m loving the finished project!